Fluffy 5-Ingredient Granola Scones – A Wholesome Treat in Minutes
There’s something timelessly comforting about scones—golden on the outside, soft and tender on the inside, and effortlessly adaptable to sweet or savory cravings. These 5-Ingredient Granola Scones take the classic teatime favorite to a whole new level. They’re made with just a handful of pantry staples, and the twist of fruity granola adds both texture and nutrition. With no need for eggs or butter, this is a fuss-free recipe ideal for beginners, busy families, or anyone who loves baking without complications.
Whether you’re hosting a brunch, planning a picnic, or simply craving a homemade baked good to go with your tea or coffee, this recipe is for you. Let’s dive into everything you need to know about making these irresistible granola scones.
Why You’ll Love This Recipe
1. It’s Beginner-Friendly
With no fancy techniques or equipment required, this recipe is perfect for novice bakers. The dough comes together in minutes, and there’s no chilling or resting time needed.
2. Only 5 Main Ingredients
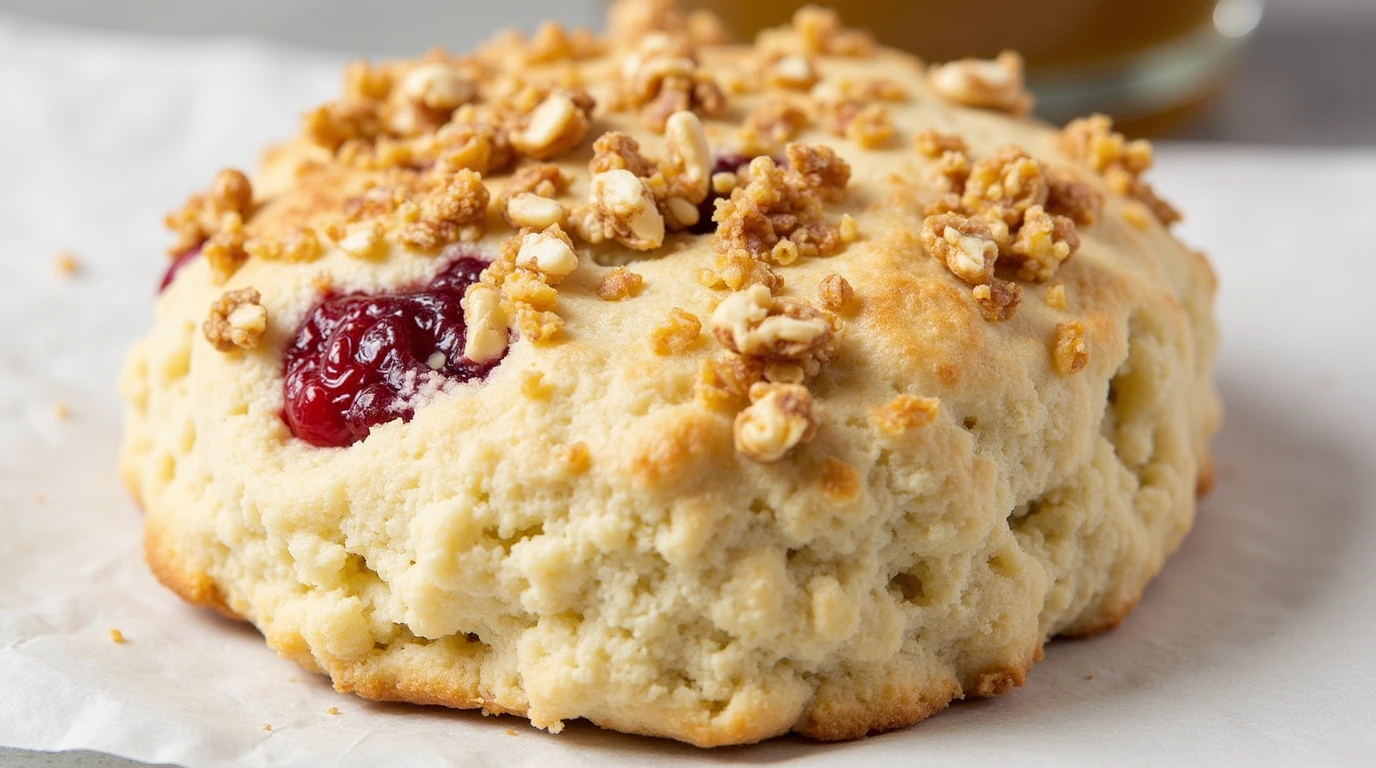
You don’t need to raid your entire pantry. With self-raising flour, cream, lemonade, granola, and milk, you can create magic. No eggs, no butter, and no mixers.
3. Versatile & Crowd-Pleasing
These scones are delicious both sweet and savory. Serve them with whipped cream and jam for a classic combo or go savory with grated cheese or a smear of butter. Ideal for family gatherings, brunch tables, or a quiet afternoon treat.
Ingredients – What You’ll Need
Main Ingredients:
-
3 cups self-raising flour – gives rise and structure
-
1 cup cream – adds moisture and richness
-
1 cup cold lemonade – for lift and lightness (yes, really!)
-
1½ cups Kellogg’s™ Fruit Mix Granola – for texture, crunch, and fruity flavor
-
2 tbsp milk – for brushing the tops, helps golden up in the oven
Serving Suggestions:
-
Strawberry jam
-
Whipped cream
-
Grated cheddar or mature cheese
Kitchen Equipment Needed
-
Large mixing bowl
-
Sieve
-
Measuring cups and spoons
-
Mixing spatula or wooden spoon
-
Baking tray
-
Baking paper or parchment
-
6 cm round cutter or glass
-
Pastry brush (for brushing milk on top)
-
Cooling rack
Optional but helpful:
-
Flour shaker (for dusting surface)
-
Offset spatula (for lifting scones)
Step-by-Step Instructions
1. Preheat & Prepare the Tray
Preheat your oven to 200°C (392°F). Line a baking tray with parchment paper for easy cleanup and even baking.
2. Make the Dough
Sieve the self-raising flour into a large bowl. This aerates the flour and helps ensure a light, fluffy texture.
Add the cream and cold lemonade. Gently fold the mixture with a spatula or wooden spoon until just combined. Do not overmix—this is key to soft, tender scones.
Add 1 cup of granola and fold through the dough. Again, mix minimally to maintain a soft dough.
3. Shape the Scones
On a well-floured surface, pat the dough gently to a thickness of about 2cm. Use a 6cm round cutter to cut out scones. If you don’t have a cutter, use a glass dipped in flour to prevent sticking.
You should get about 8 scones depending on the thickness.
4. Bake to Perfection
Place scones onto the prepared baking tray. Brush the tops lightly with milk and sprinkle the remaining ½ cup of granola over them.
Bake for 15–17 minutes or until golden brown and cooked through.
5. Cool & Serve
Allow the scones to cool slightly on a wire rack before serving.
Serve with strawberry jam and whipped cream for the traditional experience—or go bold with some grated cheese and butter for a delightful savory twist.
Tips & Shortcuts
-
Cold ingredients are key. The cold lemonade helps activate the rising agents and contributes to the airy texture.
-
Use parchment paper to prevent sticking and encourage even baking.
-
No cutter? A floured drinking glass works just as well.
-
Make-ahead tip: The dough can be prepped a few hours ahead and stored in the fridge (covered).
-
Avoid overmixing – it leads to dense scones. Stop folding the dough as soon as it comes together.
Recipe Variations
1. Nutty Crunch Scones
Add chopped almonds, walnuts, or pecans to the granola for an extra layer of crunch.
2. Citrus Zest Boost
Mix in lemon or orange zest to brighten the flavor and enhance the fruitiness of the granola.
3. Chocolate Chip Delight
Fold in ½ cup of mini chocolate chips for an indulgent, dessert-style scone.
4. Gluten-Free Swap
Use a self-raising gluten-free flour blend. Ensure your granola is also certified gluten-free.
5. Vegan Option
Substitute the cream with thick coconut cream and use a plant-based lemonade. Brush the tops with a non-dairy milk.
How to Store & Reheat
Room Temperature
Store leftover scones in an airtight container at room temperature for up to 2 days.
Refrigerator
To keep them fresh a bit longer, refrigerate for up to 4 days. Reheat in the oven for 5 minutes at 180°C (356°F).
Freezer Friendly
These scones freeze beautifully! Freeze individually wrapped scones in a zip-top bag for up to 2 months. Thaw at room temperature and reheat in the oven for best results.
Pairing Suggestions
Beverages:
-
Hot black tea or English breakfast
-
Iced chai latte
-
Fresh orange juice
-
A crisp apple cider or rosé for an afternoon treat
Meal Ideas:
-
Serve alongside a fruit platter for brunch
-
Enjoy with a light salad for lunch
-
Pair with hearty soups for a unique bread alternative
Frequently Asked Questions (FAQ)
Q: Can I use plain flour instead of self-raising flour?
Yes, but you’ll need to add 1½ teaspoons of baking powder per cup of flour to achieve the same rise.
Q: Why is there lemonade in the recipe?
The carbonation in lemonade helps lift the dough, making the scones light and fluffy. The sugar and citrus also enhance flavor.
Q: Can I use Greek yogurt or sour cream instead of cream?
Yes. Full-fat Greek yogurt or sour cream can be used in equal amounts for a tangier taste.
Q: My dough is too sticky. What should I do?
Lightly dust your hands and surface with flour. Avoid adding too much flour to the dough itself—it should remain moist and soft.
Q: How do I know the scones are done?
They should be golden brown on top and sound slightly hollow when tapped on the bottom. An inserted toothpick should come out clean.
Final Thoughts
These 5-Ingredient Granola Scones are a testament to the fact that simple ingredients can produce spectacular results. With just minutes of prep and a short bake time, you can have a warm, comforting treat on the table any day of the week.
Whether you serve them as a quick breakfast, a charming teatime offering, or a bake-sale staple, these scones are bound to impress. They’re kid-friendly, adult-approved, and infinitely customizable.