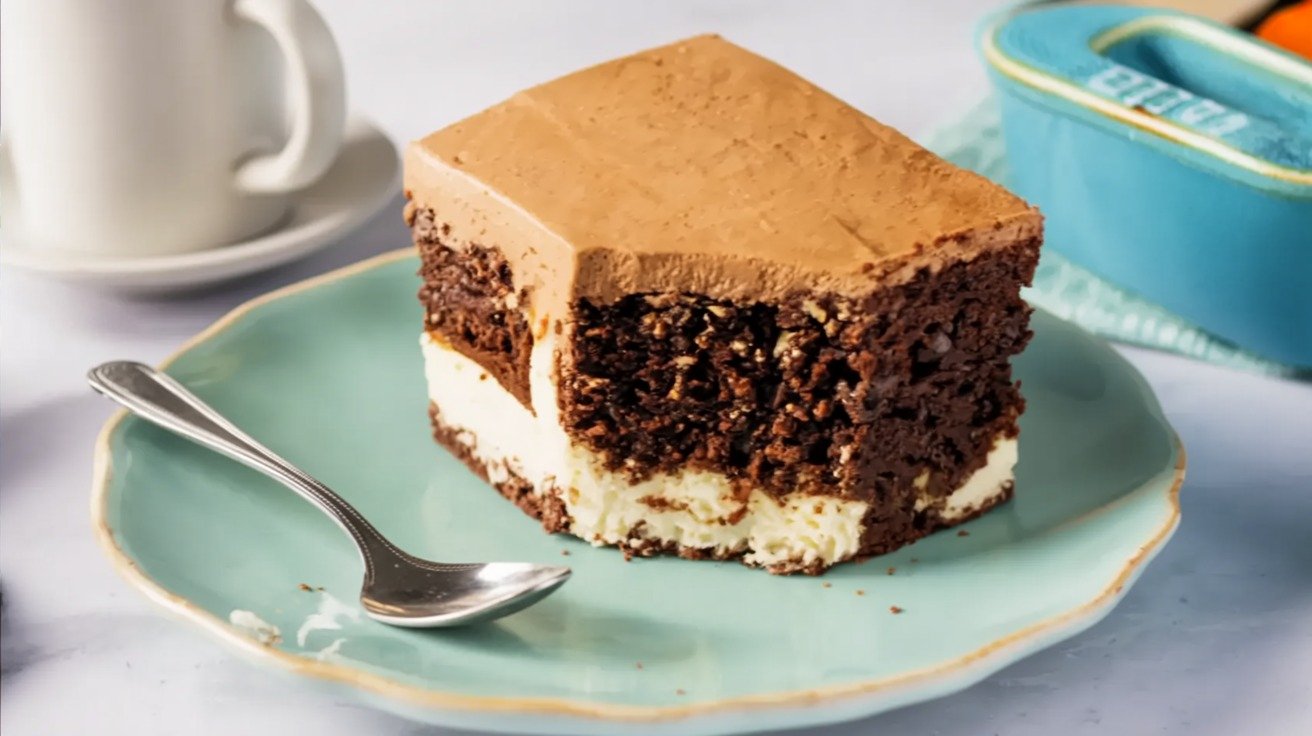
Every family has that one dessert that disappears before dinner is done. For us, it’s this Italian Love Cake recipe—a make-ahead marvel with a cocoa-rich base, a silky ricotta layer that magically bakes to the middle, and a cool, chocolate-pudding cloud on top. Here’s a question to stir your curiosity: if most layer cakes demand last-minute frosting, why do seasoned bakers swear their results improve after an overnight chill? Because time lets flavors bloom and layers set—exactly why this dessert tastes better the next day and slices picture-perfect for gatherings.
Ingredients List
Rich, café-kissed chocolate cake, dreamy ricotta, and a cool custardy finish. Measure accurately, use room-temp eggs, and keep the cream and milk cold for billowy topping.
| Component | Ingredient | Amount |
|---|---|---|
| Cake | Nonstick cooking spray | as needed |
| Chocolate cake mix (15.25 oz) | 1 box | |
| Black coffee, room temperature | 1 cup | |
| Large eggs | 3 | |
| Neutral oil | 1/2 cup | |
| Ricotta Layer | Whole-milk ricotta cheese | 32 oz (1 container) |
| Large eggs | 4 | |
| Granulated sugar | 3/4 cup (150 g) | |
| Vanilla extract | 1 tsp | |
| Topping | Heavy whipping cream, cold | 1 1/4 cups |
| Instant chocolate pudding mix (3.9 oz) | 1 package | |
| Milk, cold | 1 1/2 cups |
Sensory cue: You’re aiming for a tender, coffee-moistened crumb, a custardy-sweet ricotta middle, and a mousse-like chocolate top that slices with clean, glossy edges.
Timing
- Prep: 20 minutes
- Bake: 55–60 minutes
- Chill/Set: 6 hours to overnight (best flavor)
- Total (active + bake): ~1 hour 20 minutes, then hands-off chill
Context: You’ll spend ~20% less active time than many layer cakes that require mixing, cooling, and frosting multiple tiers.
Step-by-Step Instructions
Step 1: Heat & Pan
Preheat oven to 350°F (175°C). Spray a 13×9-inch pan with nonstick spray. For ultra-clean release, add a parchment sling.
Step 2: Mix the Chocolate Cake
In a bowl, whisk cake mix, coffee, 3 eggs, and oil until smooth, about 45–60 seconds. Coffee deepens cocoa notes without tasting like coffee. Spread batter evenly in the pan.
Step 3: Whisk the Ricotta Filling
In a separate bowl, whisk ricotta, 4 eggs, sugar, and vanilla until velvety (1–2 minutes). Don’t over-mix; you want silky, not foamy.
Step 4: The Signature Pour
Gently pour the ricotta mixture over the cake batter. It will look wrong—and that’s right. In the oven, layers invert by density: the ricotta sinks into the middle as the cake rises around it.
Step 5: Bake to Set
Bake 55–60 minutes until the center is just set and a tester comes out with a few moist crumbs (not wet ricotta). The top may show gentle, shallow cracks—that’s normal.
Step 6: Cool Completely
Cool on a rack until room temp, about 1 hour. A warm cake will melt the topping, so don’t rush.
Step 7: Whip the Chocolate Cloud
Whisk cold milk and instant chocolate pudding for 2 minutes until thick. In a separate bowl, whip cold heavy cream to soft peaks. Fold the pudding into the cream to make a light, mousse-like topping.
Step 8: Top, Chill, and Love Tomorrow
Spread the chocolate topping over the cooled cake. Cover and chill 6–24 hours. Overnight = cleaner slices and deeper flavor.
Step 9: Slice & Serve
Warm a thin knife under hot water, wipe dry, and slice in long strokes for café-worthy squares.
Nutritional Information (Approx. per 1 of 15 slices)
- Calories: ~370
- Carbohydrates: ~35 g
- Protein: ~11 g (thanks to ricotta)
- Fat: ~20 g
- Saturated Fat: ~9 g
- Cholesterol: ~105 mg
- Sodium: ~320 mg
- Sugar: ~26 g
Note: Values are estimates and vary by cake mix brand and dairy choice.
Healthier Alternatives for the Recipe
- Lighten the dairy: Swap part-skim ricotta for whole-milk; reduce sugar in ricotta layer to 1/2 cup for a subtler sweetness.
- Lean topping: Use light whipped topping instead of whipped cream; or fold pudding into Greek yogurt for tangy protein.
- Smarter cake base: Choose a reduced-sugar chocolate mix or use half coffee, half milk for a gentler crumb.
- Gluten-free: Use a gluten-free chocolate cake mix; the rest remains unchanged.
- Lower sugar finish: Dust with unsweetened cocoa and dark-chocolate shavings instead of the full topping for a bittersweet finish.
Serving Suggestions
- Italian café style: Dust with cocoa, add orange zest micro-grates on top, and serve with espresso.
- Celebration squares: Pipe rosettes of whipped cream and finish with chocolate curls or candied orange peel.
- Berry contrast: Top slices with macerated raspberries for acidity that cuts richness.
- Holiday platter: Sprinkle with crushed pistachios and a drizzle of warm chocolate sauce just before serving.
Common Mistakes to Avoid
- Pouring layers incorrectly: Always pour ricotta mixture over cake batter (not under). That inversion magic depends on it.
- Warm topping on warm cake: The topping will melt and weep. Cool thoroughly before frosting.
- Under-chilling: Less than 6 hours leads to messy slices and muted flavor.
- Over-baking: Dry cake + rubbery ricotta. Pull when the center is set with slight jiggle and a few moist crumbs on a tester.
- Skipping coffee: Coffee amplifies chocolate; you won’t taste “coffee,” just deeper cocoa.
Storing Tips for the Recipe
- Refrigeration: Cover tightly; keep up to 4 days. Flavor peaks on day 2.
- Freezing: Chill to set, then wrap the pan (or individual slices) in plastic + foil. Freeze up to 2 months. Thaw overnight in the fridge; add fresh cocoa dusting before serving.
- Make-ahead plan: Bake in the evening, top once cool, and chill overnight for stress-free entertaining.
Conclusion
This Italian Love Cake recipe is the definition of low-stress, high-reward baking: a coffee-kissed chocolate base, a custardy ricotta middle that bakes itself into place, and a cool, mousse-like chocolate crown. It slices clean, travels well, and tastes even better the next day—exactly what a make-ahead dessert should be. Try it for your next gathering, then rate the recipe, leave a comment with your twist, and subscribe for more make-ahead desserts and Italian-inspired classics.
FAQs
Q1. Can I use part-skim ricotta instead of whole-milk?
Yes. Part-skim ricotta works and trims fat slightly; texture stays custardy, though a touch less creamy.
Q2. Do I have to use coffee in the cake?
No, but coffee deepens chocolate flavor without tasting like coffee. Replace with water or milk if preferred.
Q3. My layers didn’t invert—what happened?
Most often: over-mixing the batters together or using a too-thick cake batter. Pour layers gently and avoid swirling.
Q4. How long should I chill before serving?
Minimum 6 hours; overnight is ideal for structure and flavor bloom.
Q5. Can I make this gluten-free?
Yes—use a gluten-free chocolate cake mix and proceed as written.
Q6. How many servings does this make?
A 13×9 pan yields 15–18 slices, depending on how generous you cut.
Cheesy Cream Cheese Corn Casserole (Jiffy, One-Bowl)
Equipment
- 9×13-inch baking dish (3-quart)
- Large mixing bowl
- Whisk
- Rubber spatula
- Cooking spray or butter for greasing
- Aluminum foil (optional, for tenting)
Ingredients
Base
- 1 can (15 oz) whole kernel corn, drained sweet crunch for texture
- 1 can (15 oz) creamed corn adds custardy silkiness
Dairy & Richness
- 8 oz cream cheese, softened and cubed room temperature blends fastest
- 1/4 cup unsalted butter, melted buttery aroma; helps browning
Lift & Structure
- 1 box (8.5 oz) Jiffy corn muffin mix light lift; gentle sweetness
Bind
- 2 large eggs sets the casserole cleanly
Tang
- 1/2 cup sour cream balances richness; tender crumb
Cheese
- 1 cup sharp cheddar, shredded plus extra for topping
Instructions
- Heat & Prep: Preheat oven to 350°F (175°C). Grease a 9×13-inch baking dish (or 3‑quart casserole). A light spray plus a quick swipe with a paper towel gives even coverage and cleaner edges.
- One‑Bowl Mix: In a large bowl, whisk melted butter with softened cream cheese until mostly smooth. Whisk in sour cream, then eggs until glossy and cohesive. If cream cheese resists, microwave 10–15 seconds or use a hand mixer briefly.
- Fold in the Corn: Stir in both cans: drained whole‑kernel corn for pops of texture and creamed corn for a custardy base. Batter should look rich and spoonable.
- Add Jiffy & Cheese: Sprinkle in the Jiffy mix; fold just until no dry streaks remain. Stir in 1 cup shredded cheddar. Avoid overmixing to keep the crumb tender.
- Pan & Top: Spread batter into prepared dish. For a bubbly crust, scatter a small handful of extra cheddar on top.
- Bake to Golden: Bake 45–50 minutes until the center is set (a slight jiggle is OK), edges are lightly browned, and a toothpick near center comes out with moist crumbs (not wet batter). If the top browns too quickly, tent loosely with foil for the last 10 minutes.
- Rest & Serve: Cool 10 minutes to set the custard‑like interior. Scoop for a cozy presentation or slice neat squares for buffet‑style serving.
Notes
Mix‑Ins: Try 1–2 chopped jalapeños, 6 slices cooked crumbled bacon, or 3–4 sliced green onions.
Pan Options: 2× 8‑inch square pans (reduce bake time slightly) or a deep 2‑quart dish (increase time as needed).
Storage: Refrigerate leftovers up to 4 days. Reheat, covered, at 325°F until warmed through.
Nutrition values are estimates and vary by brand; enter your specific products for precise tracking.