
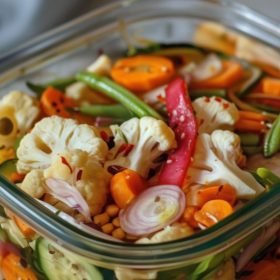
Do you love the bright, tangy crunch of pickled vegetables but feel intimidated by the idea of traditional canning? If you imagine sterilization, water baths, and complex equipment, I have great news: you can skip all of it. This recipe for Refrigerator Pickled Vegetables is the perfect, foolproof solution.
We’re making a quick pickle, which means the vinegar brine and the cold of the refrigerator do all the work. There’s no canning and no special equipment required. In less than 30 minutes of active time, you can create a jar (or three!) of stunningly colorful, incredibly crunchy, and perfectly tangy mixed vegetables. This is the ultimate way to preserve that fresh-produce snap and add a burst of flavor to any meal.
Ingredients You’ll Need
Here’s your shopping list. The beauty of this recipe is its flexibility, but this combination provides a fantastic mix of color, flavor, and crunch.

| Category | Ingredient | Amount/Quantity |
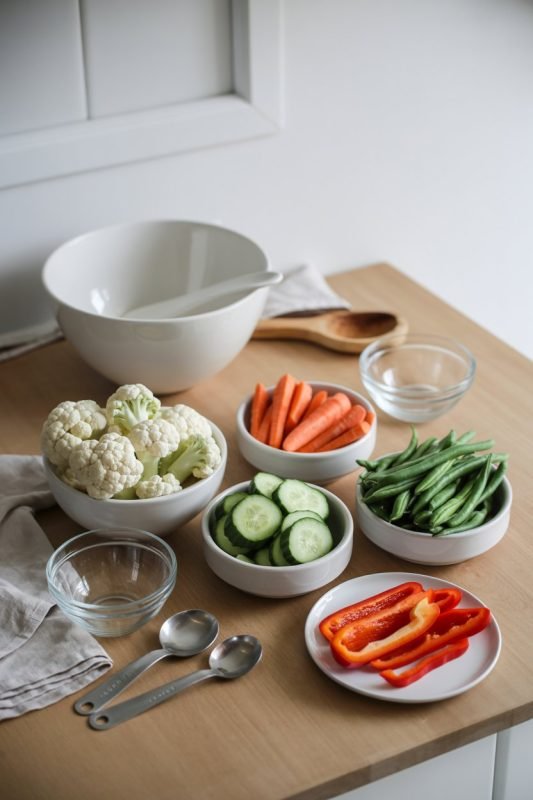
| Fresh Vegetables | Crisp cauliflower florets | 2 cups |
| Sliced carrots | 1 cup | |
| Sliced cucumbers | 1 cup | |
| Bright red bell pepper, sliced | 1 | |
| Fresh green beans, trimmed | 1 cup | |
| Flavor Boosters | Potent minced garlic | 3 cloves |
| Mustard seeds | 2 teaspoons | |
| Whole black peppercorns | 1 teaspoon | |
| Red pepper flakes (optional) | ½ teaspoon | |
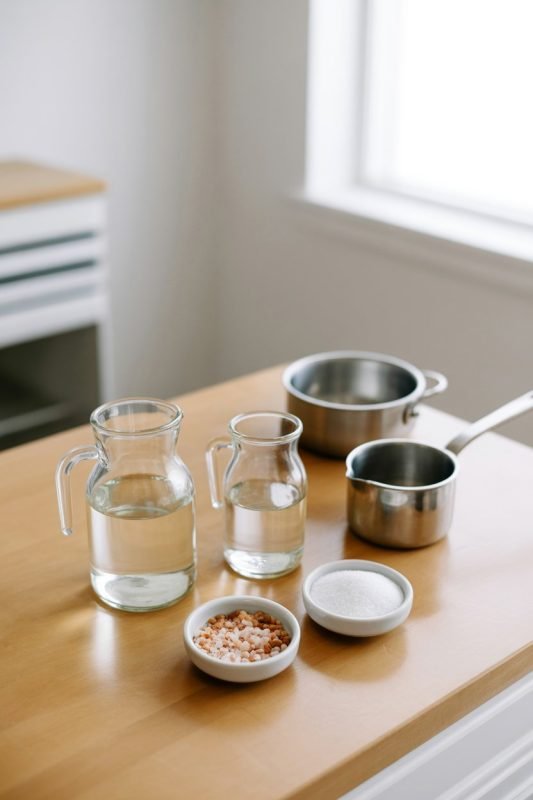
| Brine Base | White vinegar (5% acidity) | 2 cups |
| Water | 2 cups | |
| Salt (Kosher or pickling) | 2 tablespoons | |
| Sugar | 1 tablespoon |
Timing
- Preparation Time: 20 minutes (for washing and chopping veggies)
- Cook Time: 10 minutes (for boiling the brine)
- Total Active Time: 30 minutes
- Inactive Chill Time: 24 hours (minimum)
All the active work is done in less than 30 minutes, about the time it takes to watch an episode of your favorite show. The hardest part is just waiting for those 24 hours for the flavors to infuse!
Step-by-Step Instructions
Step 1: Prep Your Vegetable Rainbow
Your first step is to prepare the vegetables. Thoroughly wash and cut all your fresh veggies.
Tip: Try to keep the pieces fairly uniform in size. This not only looks more attractive in the jar but also ensures every piece pickles at the same rate. For example, slice carrots into coins, cut cauliflower into small, bite-sized florets, and slice cucumbers about 1/4-inch thick.
Step 2: Create the Tangy Brine
In a medium saucepan, combine the white vinegar, water, salt, sugar, minced garlic, mustard seeds, black peppercorns, and optional red pepper flakes.
Action: Bring this mixture to a rolling boil over medium-high heat, stirring gently until you see that the salt and sugar have completely dissolved. This boiling step is crucial for melding the flavors and creating a clear, potent brine that will beautifully pickle your vegetables.
Step 3: Combine and Steep
Place all your prepared, chopped vegetables into a large, heat-proof bowl. Carefully pour the hot, boiling brine directly over the vegetables.
Tip: Pour slowly to avoid any splashing. Use a spoon to gently press the vegetables down, making sure every single piece is fully submerged in the hot liquid. Let this entire mixture sit out on the counter and cool to room temperature (this usually takes about 1 hour).
Step 4: Jar and Chill
Once the mixture has cooled, you’re ready to jar them. Pack the vegetables tightly into glass jars (Mason jars are perfect for this). Pour the remaining brine from the bowl into the jars, ensuring once again that all the veggies are covered by the liquid.
Pro-Tip: If you’re a bit short on brine, don’t worry! You can top it off with a 50/50 mix of white vinegar and water. Seal the jars tightly with their lids.
Step 5: The (Hardest) Part: Be Patient!
Place the sealed jars into the refrigerator. You must let them chill for at least 24 hours before eating. This waiting period is non-negotiable! It allows the brine to penetrate the vegetables, transforming them from raw to truly pickled.
Good to know: These pickles are great after 24 hours, but they are at their absolute prime after 3-5 days.
Nutritional Information
These pickled vegetables are a fantastic, low-calorie way to add excitement to your plate. The nutritional information is an estimate for a 1/2-cup serving.
- Calories: 35 kcal
- Carbohydrates: 7 g
- Protein: 1 g
- Fat: 0 g
- Sugar: 3 g
- Sodium: 250 mg (This can vary based on the salt used)
They are fat-free and loaded with the vitamins and fiber from the fresh, raw vegetables, making them a healthy, flavorful condiment.
Healthier Alternatives and Variations
This recipe is already quite healthy, but you can easily tweak it to fit your dietary needs or flavor preferences.
- Lower Sugar: The sugar helps balance the vinegar’s sharpness, but you can reduce it to just a teaspoon or use a sugar substitute like stevia or monk fruit.
- Lower Sodium: You can reduce the salt to 1.5 tablespoons, but don’t eliminate it completely. Salt is essential for the pickling process and flavor.
- Different Vinegars: Swap the white vinegar for apple cider vinegar for a fruitier, milder tang. Rice vinegar also works for a very delicate flavor.
- Spice it Up: Add 1-2 sliced jalapeños or habaneros to the vegetable mix for a serious kick.
- Add Fresh Herbs: For a different flavor profile, add a few sprigs of fresh dill or a teaspoon of coriander seeds to the brine.
Serving Suggestions
You’ll find yourself putting these on everything. They are incredibly versatile!
- As a Side: Serve them as a crunchy, zesty side dish with heavy or rich meals like barbecue, roasted meats, or creamy pasta.
- On Sandwiches & Wraps: This is my favorite use! They add a perfect crunch and tangy bite that cuts through the richness of deli meats, cheese, or hummus.
- In Salads: Coarsely chop them and toss them into green salads, potato salads, or grain bowls for a surprise burst of flavor.
- On a Charcuterie Board: Their bright colors and bold flavor make them a perfect addition to any cheese or cured meat platter.
- Straight from the Jar: Honestly? They’re a fantastic snack all by themselves.
Common Mistakes to Avoid
This recipe is simple, but avoid these common pitfalls for the best refrigerator pickled vegetables.
- Not Dissolving the Salt/Sugar: If you don’t bring the brine to a full boil, the salt and sugar won’t dissolve. This creates a gritty, cloudy brine and unevenly flavored pickles. Solution: Stir at a boil until the liquid is perfectly clear.
- Leaving Veggies Exposed: Any vegetable peeking up above the brine line is not pickling—it’s spoiling. Solution: Always press the veggies down and ensure they are fully submerged before sealing the jar.
- Eating Too Soon: I know it’s tempting, but eating them after only a few hours will be disappointing. They’ll just taste like raw veggies in vinegar. Solution: Be patient! Wait the full 24 hours.
- Using the Wrong Salt: Do not use regular iodized table salt. The iodine can make the brine cloudy and the pickles an odd color. Solution: Stick to Kosher salt, pickling salt, or pure sea salt.

Storing Tips
This is the most important rule: these are refrigerator pickles, not shelf-stable pickles.
- Storage: They must be stored in an airtight glass jar in the refrigerator. They cannot be stored in a pantry or at room temperature.
- Duration: Kept properly chilled, your homemade pickled vegetables will stay crisp and delicious for up to 1 month. The flavor will continue to develop and get even better over the first couple of weeks.
Conclusion
And there you have it! A simple, endlessly customizable recipe for crunchy, tangy refrigerator pickled vegetables. This is your ticket to a world of bright, zesty flavor without any of the fuss of traditional canning. It’s the perfect way to use up extra produce, add a healthy kick to your meals, and impress your friends with your “pickling” skills.
We truly hope you love this easy recipe. Try it out and let us know in the comments below how it turned out! What vegetable combinations are your favorite? Don’t forget to rate the recipe and subscribe to our blog for more delicious, no-fuss inspiration.
FAQs (Frequently Asked Questions)
Q1. Can I use different vegetables than the ones listed?
Absolutely! This brine is a perfect base for almost any crisp vegetable. Try adding sliced jalapeños, radishes, red onions, asparagus spears, or even broccoli florets. The key is to use firm, fresh veggies.
Q2. Why do I have to pour the brine over the vegetables while it’s hot?
The hot brine helps to very lightly “blanch” the tougher vegetables like carrots and cauliflower, allowing them to absorb the pickling liquid faster while still staying crunchy. It’s a key step in a quick pickle.
Q3. Is this recipe “canning”? Are these pickles shelf-stable?
No. This is not canning. This recipe does not involve a sterilization or water-bath sealing process. Therefore, these pickles are not shelf-stable and must be stored in the refrigerator to keep them safe and fresh.
Q4. My garlic turned blue or green! Is it safe to eat?
Yes, this is perfectly safe and surprisingly common! It’s a harmless chemical reaction that can happen when enzymes in the garlic react with the acid in the vinegar. It might look a little strange, but it doesn’t affect the flavor or safety of your pickles at all.
Easy Refrigerator Pickled Vegetables (Crunchy & Tangy!)
Equipment
- Medium saucepan
- Heat-proof mixing bowl
- Mason jars with lids (2 to 3 quarts total)
- Ladle
- Tongs or slotted spoon
Ingredients
Fresh Vegetables
- 2 cups crisp cauliflower florets
- 1 cup sliced carrots (coins)
- 1 cup sliced cucumbers (about 1/4-inch thick)
- 1 red bell pepper, sliced
- 1 cup fresh green beans, trimmed
Flavor Boosters
- 3 cloves garlic, minced potent
- 2 tsp mustard seeds
- 1 tsp whole black peppercorns
- 1/2 tsp red pepper flakes (optional)
Brine Base
- 2 cups white vinegar (5% acidity)
- 2 cups water
- 2 tbsp kosher or pickling salt
- 1 tbsp sugar
Instructions
- Prep vegetables: Wash and cut all vegetables into uniform, bite-sized pieces. Slice carrots into coins, break cauliflower into small florets, slice cucumbers ~1/4-inch, and trim green beans.
- Make brine: In a medium saucepan, combine vinegar, water, salt, sugar, minced garlic, mustard seeds, black peppercorns, and optional red pepper flakes. Bring to a rolling boil over medium-high heat, stirring until salt and sugar dissolve.
- Pour over veggies: Place all vegetables in a large heat-proof bowl. Carefully pour hot brine over them, pressing gently so everything is fully submerged. Let cool at room temperature, about 1 hour.
- Jar and cover: Pack vegetables tightly into clean glass jars. Ladle in brine to fully cover. If short on liquid, top off with a 50/50 mix of vinegar and water. Seal with lids.
- Chill: Refrigerate for at least 24 hours before eating (best after 3–5 days). Keep refrigerated; enjoy within 2–3 weeks for peak crunch.