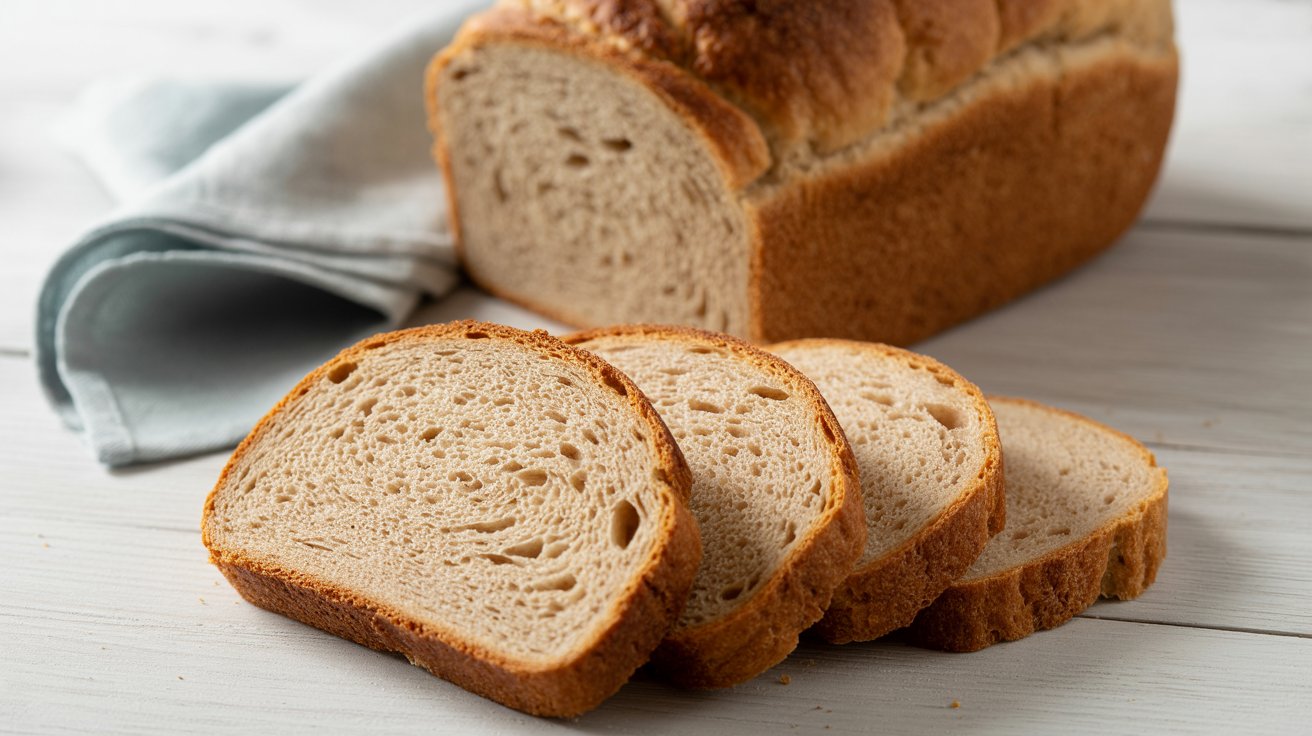
Best Whole Wheat Bread – A Hearty Homemade Classic
There’s nothing quite like the smell of freshly baked bread wafting through the kitchen. Whether you’re a seasoned baker or a beginner dipping your hands into dough for the first time, this Best Whole Wheat Bread recipe is a foolproof way to enjoy a healthier, heartier loaf. Made with wholesome ingredients like whole wheat flour, honey, and a touch of butter, this bread is soft, slightly sweet, and packed with fiber — perfect for sandwiches, toast, or enjoying warm with a pat of butter.
Why You’ll Love This Whole Wheat Bread Recipe
This recipe is for anyone who:
-
Wants to make homemade bread that’s healthier than store-bought.
-
Is looking for a beginner-friendly yeast bread that delivers consistent results.
-
Desires a soft yet sturdy loaf that doesn’t crumble when sliced.
-
Needs a reliable base recipe that’s easy to customize.
It’s a beautiful blend of nutrition and flavor — the whole wheat flour offers extra fiber and nutrients, the honey brings a touch of natural sweetness, and the butter ensures a soft crumb. Whether you’re making it for your kids’ lunchboxes, your Sunday brunch, or just for the joy of baking, this is the kind of bread that belongs in your regular rotation.
Ingredients You’ll Need
Here’s what goes into making the Best Whole Wheat Bread:
-
1 cup water
-
¼ cup milk* (Dairy or non-dairy alternatives can be used)
-
3 tablespoons honey
-
2 ¼ teaspoons active dry yeast (1 packet, or you can use instant yeast)
-
3 cups (339 grams) whole wheat flour, plus more if needed
-
1 ½ teaspoons salt
-
3 tablespoons unsalted butter, cut into pieces and softened
*Note: Milk adds tenderness and flavor, but you can swap it for more water or a plant-based milk if preferred.
Step-by-Step Instructions
1. Warm the Liquids
Combine the water and milk in a microwave-safe measuring cup. Heat until warm (105–115°F). This is the ideal temperature range to activate the yeast. If using a stovetop, just warm gently in a saucepan — do not boil.
2. Activate the Yeast
Pour the warm liquid into the bowl of your stand mixer. Add honey and yeast, then stir. Let it sit for 5–10 minutes. You’ll see the mixture foam — that’s your yeast working! If nothing happens, start over with fresh yeast.
3. Mix the Dough
Add the flour, salt, and softened butter. Using the paddle attachment, mix until combined.
4. Knead the Dough
Switch to the dough hook. Knead on low speed for about 8 minutes. The dough should be soft and slightly sticky but not overly wet. Add more flour 1 tablespoon at a time if needed.
5. First Rise
Transfer the dough to an oiled bowl, turning it once to coat. Cover with a clean towel and let it rise until doubled in size — about 1 hour.
6. Shape the Dough
Punch down the dough gently. Roll it into a 9×13-inch rectangle. Starting at the short edge, roll it up like a jelly roll and place seam-side down in a greased 9×5-inch loaf pan.
7. Second Rise
Cover and let rise again until the dough just peeks above the top of the pan — about 30–45 minutes.
8. Bake
Preheat your oven to 350°F. Bake for 35–45 minutes until the internal temperature reaches 200°F. (Glass pans bake quicker; metal pans may take longer.)
9. Cool and Enjoy
Brush the crust with butter if desired. Let the bread cool in the pan for 15 minutes, then transfer to a wire rack to cool completely before slicing.
Kitchen Equipment You’ll Need
To make this recipe, you’ll need:
-
Stand mixer with paddle and dough hook attachments (optional, but recommended)
-
Microwave-safe measuring cup or saucepan
-
Mixing bowls
-
9×5-inch loaf pan (glass or metal)
-
Rolling pin
-
Spatula
-
Clean kitchen towel
-
Cooling rack
-
Instant-read thermometer (optional but helpful for checking doneness)
Storage Tips
-
Room Temperature: Store in an airtight container for up to 3 days.
-
Freezer: Wrap tightly in plastic wrap and foil, then freeze for up to 3 months. Slice before freezing for easy access to individual pieces.
-
Reheating: Thaw at room temperature or toast straight from the freezer.
Tasty Pairings and Serving Suggestions
-
Breakfast: Toast a slice and top with almond butter, banana, and a drizzle of honey.
-
Lunch: Use it for sandwiches — turkey, hummus and veggies, or classic PB&J.
-
Dinner: Serve warm slices with soups like butternut squash, tomato basil, or lentil stew.
-
Snack: Enjoy with cream cheese, fruit preserves, or just plain with melted butter.
Recipe Variations & Swaps
-
Flour Options: Swap 1 cup of whole wheat flour for all-purpose flour for a lighter texture.
-
Sweetener: Use maple syrup or agave nectar instead of honey.
-
Butter Substitute: Olive oil or coconut oil can be used in place of butter.
-
Add-ins: Mix in ¼ cup of sunflower seeds, oats, or chopped nuts for extra texture.
-
Flavor Boost: Add cinnamon, rosemary, or garlic powder for a twist.
Pro Tips for Success
-
Proof Your Yeast: Always make sure your yeast is active. If it doesn’t foam in the warm liquid, it’s likely expired.
-
Dough Texture: It’s okay if your dough is a bit sticky. Don’t over-flour or the bread will be dense.
-
Rolling Technique: Rolling the dough tightly helps ensure a good structure with minimal gaps inside the loaf.
-
Let It Cool: Slicing hot bread will crush the crumb. Let it cool completely for clean, even slices.
Frequently Asked Questions (FAQ)
Q: Can I make this bread without a stand mixer?
A: Absolutely! Mix by hand with a sturdy spoon and knead on a floured surface for about 10–12 minutes until the dough is smooth and elastic.
Q: What if I only have instant yeast?
A: Instant yeast works just as well. You can skip the proofing step and mix it directly with the dry ingredients.
Q: How do I know when the bread is done baking?
A: Tap the bottom of the loaf — it should sound hollow. Or use an instant-read thermometer to check for 200°F internally.
Q: Why did my bread turn out dense?
A: Dense bread can be caused by not kneading long enough, using expired yeast, or adding too much flour. Make sure the dough is soft and slightly sticky before the first rise.
Q: Can I double the recipe?
A: Yes, you can! Just make sure to use two loaf pans and rotate them in the oven halfway through baking for even cooking.
Final Thoughts
This Best Whole Wheat Bread is everything you want in a homemade loaf: hearty, soft, subtly sweet, and completely satisfying. It’s a staple recipe that works beautifully for toast, sandwiches, or snacking — and once you try it, you’ll never want to go back to store-bought bread.
If you make this recipe, don’t forget to share it with your friends and family, and subscribe to the blog for more wholesome, high-quality recipes made simple. Let us know how your bread turns out in the comments below!
Happy baking!