Better Than Bakery Raspberry Scones: The Ultimate Homemade Brunch Treat
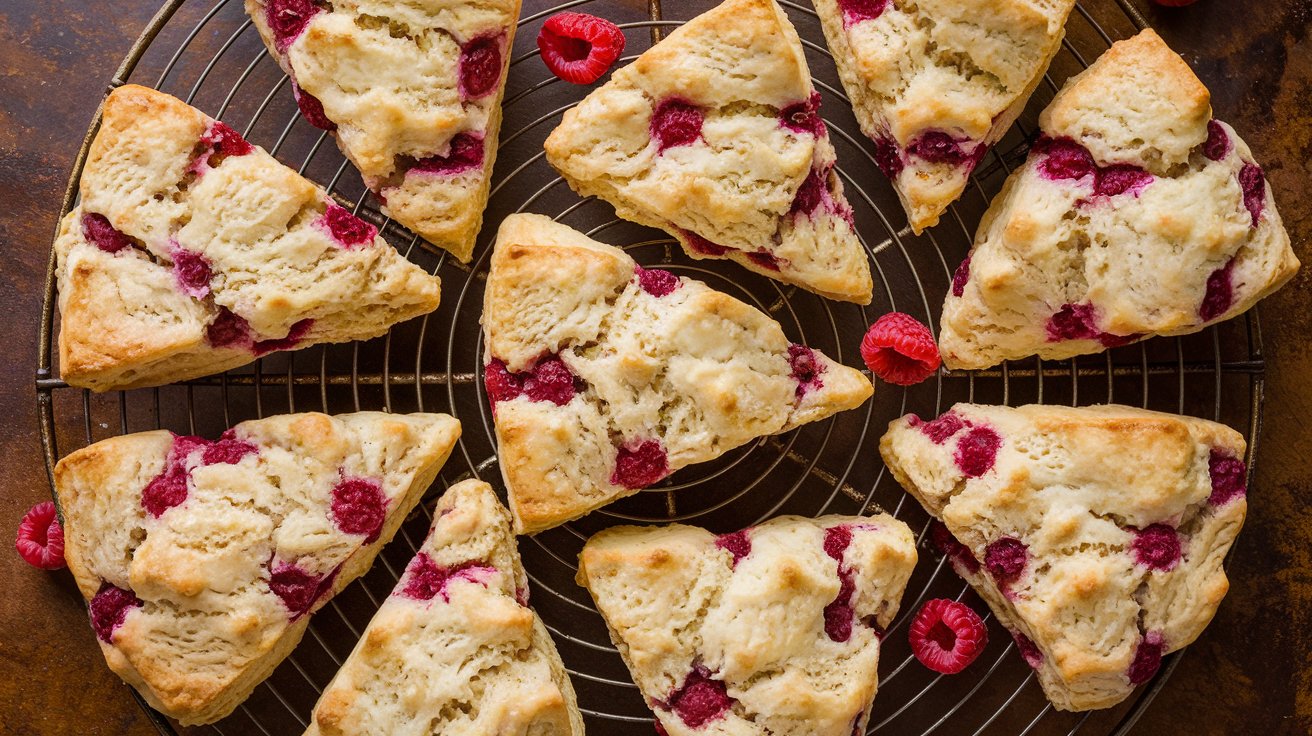
If you’ve ever walked past a bakery window and admired those golden, buttery scones bursting with berries, you’re in for a real treat. This recipe for Better Than Bakery Raspberry Scones lives up to its name and then some. With a crisp exterior, tender flaky layers, and juicy raspberries folded right in, these scones are the perfect way to bring a touch of artisanal elegance to your breakfast or brunch table — all without leaving your kitchen.
Whether you’re a seasoned home baker or a weekend warrior looking to up your breakfast game, this scone recipe is accessible, rewarding, and utterly delicious. From freezing cold butter to sparkling sugar tops, every detail in this recipe helps mimic (or even outdo) what you’d get at your favorite café.
Why You’ll Love These Raspberry Scones
This recipe is a dream for anyone who loves rustic, from-scratch baked goods that taste as good as they look. These scones come together in just under an hour and bake to golden perfection in 20 minutes or less.
Who is this recipe for?
-
Busy home bakers who want to impress guests with minimal fuss.
-
Berry lovers who want a way to enjoy raspberries beyond the smoothie bowl.
-
Anyone who’s tried (and failed) scones before—this method walks you through every step so you can finally nail it.
These raspberry scones are buttery, tender, and lightly sweet, with the perfect tang from the berries and a satisfying crunch from sparkling sugar. They’re perfect for brunches, tea parties, baby showers, or a weekend self-care session with a warm beverage.
Ingredients You’ll Need
Here’s the full list of ingredients for your Better Than Bakery Raspberry Scones:
-
4 tablespoons unsalted butter, frozen
-
1 cup frozen raspberries
-
1 cup + 1 tablespoon cold heavy cream
-
2 cups all-purpose flour
-
1/4 cup granulated sugar
-
2 3/4 teaspoons baking powder
-
3/4 teaspoon fine sea salt
-
1 1/2 tablespoons sparkling sugar (for that irresistible crunch on top)
Kitchen Equipment You’ll Need
To ensure success, gather the following tools before you start:
-
Box grater (for the frozen butter)
-
3 mixing bowls (one for butter, one for raspberries, one for the dough)
-
Rubber spatula
-
Measuring cups and spoons
-
Knife and cutting board (for dividing the dough)
-
Parchment paper
-
Baking sheet
-
Wire cooling rack
Optional:
-
Bench scraper (for easier dough handling)
-
Pastry brush (if you want to brush with extra cream)
Step-by-Step Instructions
1. Prepare Your Ingredients
Line a baking sheet with parchment paper and set aside. In one bowl, grate your frozen butter and return it to the freezer. In another bowl, measure your frozen raspberries and return them to the freezer as well. Finally, measure the heavy cream into a cup or bowl and keep it cold in the fridge.
2. Mix the Dry Ingredients
In a large bowl, whisk together the flour, sugar, baking powder, and salt. Add the grated butter and use a fork or your hands to distribute it evenly until the mixture looks like coarse crumbs.
3. Add the Cream
Make a well in the center and pour in the cold cream. Gently stir with a spatula until the dough is mostly combined. Use your hands to gently toss and mix the dough, letting it fall through your fingers to incorporate everything without overmixing.
4. Fold in the Raspberries
Once most of the flour is absorbed but some pockets remain, add in the frozen raspberries. Continue gently mixing until all the dry bits are incorporated. It’s okay if some berries break apart—this gives the scones beautiful natural streaks of pink.
5. Chill the Dough
Cover the bowl and place it in the refrigerator for 15 minutes. This step helps hydrate the flour and firm up the dough, making it easier to shape.
6. Shape the Scones
Transfer the dough to a lightly floured surface and press it together gently into a round, 8-inch disc. Cut into 8 even triangles. Place them on the prepared baking sheet with a few inches of space between each.
7. Add the Finishing Touch
Sprinkle each scone generously with sparkling sugar. This creates that signature crisp, caramelized top you get at bakeries. Chill the entire tray in the fridge while you preheat your oven to 400°F (205°C).
8. Bake and Cool
Bake for 15–20 minutes, until the edges and tops are golden. Cool on the pan over a wire rack before serving.
Tips and Tricks for Perfect Scones Every Time
-
Keep everything cold. Cold butter = flakier texture. Warm dough = sad, greasy scones.
-
Don’t overmix. Overworking the dough can lead to tough, dense scones. Mix just until things come together.
-
Use frozen raspberries. They hold their shape better and won’t bleed as much into the dough.
-
Add-ins welcome! Try white chocolate chips, lemon zest, or even sliced almonds for a fun twist.
How to Store Your Raspberry Scones
Room temperature: Store cooled scones in an airtight container for up to 2 days.
Refrigerator: Keep them chilled for up to 5 days. Reheat in the oven at 350°F for 5–8 minutes.
Freezer: Freeze unbaked scones (after shaping) on a baking sheet. Once solid, transfer to a zip-top bag and store for up to 2 months. Bake straight from frozen, adding 3–5 minutes to the baking time.
Suggested Pairings
These scones are rich and fruity, which makes them a perfect partner for:
-
Drinks: Earl Grey tea, cold brew coffee, or a glass of fresh orange juice
-
Condiments: Softened butter, lemon curd, or clotted cream
-
Sides: Fresh fruit salad, a yogurt parfait, or a simple egg scramble
For brunch, serve with a mimosa or bellini for a crowd-pleasing combo.
Frequently Asked Questions
Can I use fresh raspberries?
You can, but fresh raspberries are more delicate and can release too much moisture into the dough. Frozen is recommended for best structure and ease of mixing.
Can I use milk or half-and-half instead of heavy cream?
Heavy cream gives the scones their signature richness and tender crumb. You can substitute half-and-half in a pinch, but the results may be less flaky.
What’s the best way to grate butter?
Use the large holes of a box grater and work quickly. Pop the grated butter back in the freezer right away so it stays cold until mixing time.
Can I make these gluten-free?
Yes! Use a 1:1 gluten-free baking flour blend that includes xanthan gum. Results may vary slightly in texture, but they’ll still be tasty.
My dough is too sticky—what should I do?
Lightly flour your hands and surface. Avoid adding too much extra flour or the scones may turn out dry.
Final Thoughts
There’s something truly magical about pulling a tray of freshly baked raspberry scones out of the oven. The aroma, the texture, the way the berries pop against that golden crust—these Better Than Bakery Raspberry Scones are proof that you don’t need to leave your kitchen to enjoy a gourmet pastry experience.
If you try this recipe, let me know how it goes! Share your creations on social media and tag me so I can see your beautiful bakes. Don’t forget to subscribe to the blog for more indulgent, easy-to-follow recipes like this one.
Happy baking!