Protein Cheesecake: A Guilt-Free Classic Dessert with a Nutritious Twist
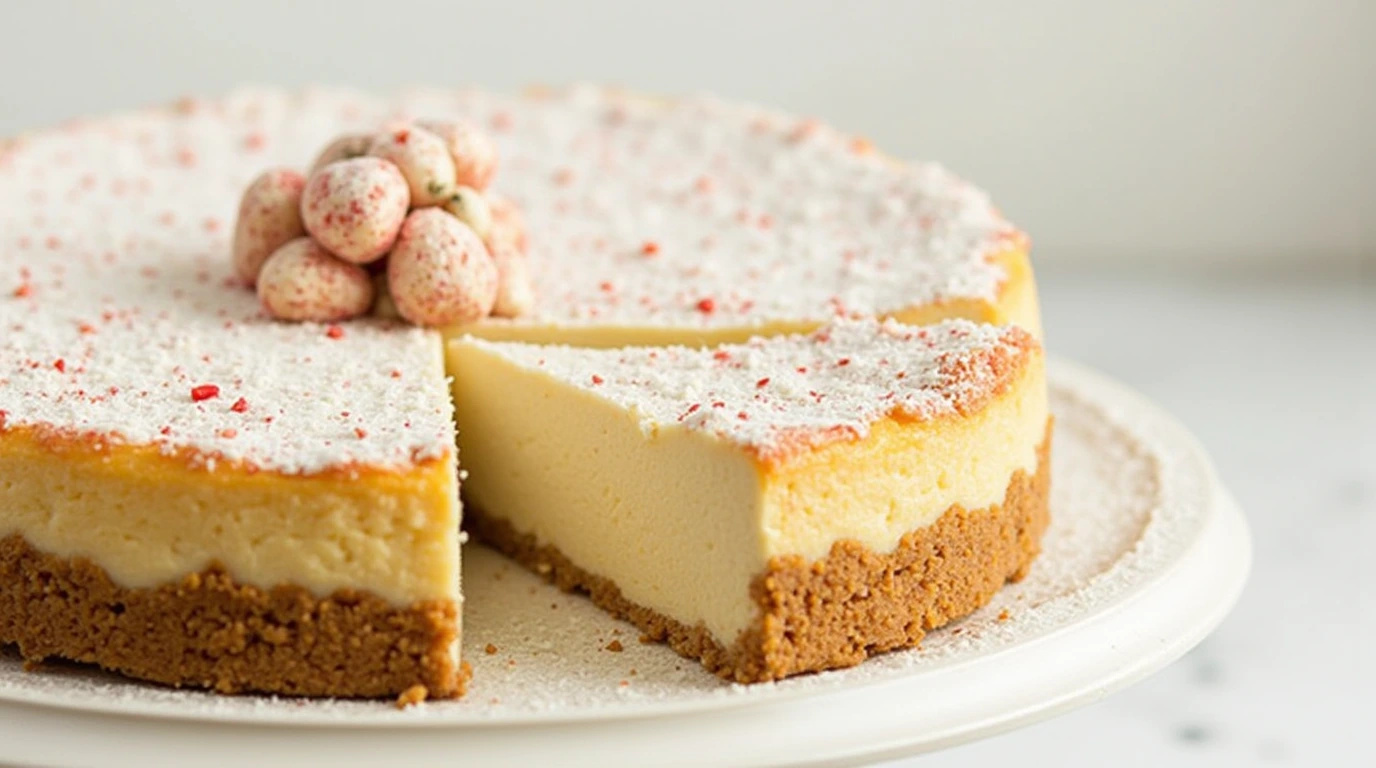
If you’re a cheesecake lover trying to eat healthier or boost your protein intake, we have the perfect recipe for you. This Protein Cheesecake delivers everything you love about the classic dessert—silky smooth texture, rich vanilla flavor, and a creamy, dreamy bite—without the excess sugar or guilt.
Designed for fitness enthusiasts, macro-conscious eaters, or anyone craving dessert with a purpose, this cheesecake is protein-packed, incredibly satisfying, and surprisingly simple to make. With a few wholesome ingredients and smart baking techniques, you can enjoy a delicious slice of cheesecake that aligns with your health goals.
Whether you’re celebrating a special occasion or simply meal-prepping indulgent yet nutritious treats for the week ahead, this protein cheesecake will become a go-to favorite in your recipe rotation.
Why This Protein Cheesecake Stands Out
There are plenty of “healthy dessert” recipes floating around, but many fall short on texture or flavor. This one doesn’t. Here’s why:
-
High protein from Greek yogurt and protein powder
-
Creamy and indulgent—you won’t believe it’s better-for-you
-
Refined sugar-free options with customizable sweeteners
-
Vegan and dairy-free adaptable
-
No crust required (but options provided if you love a base!)
-
Minimal prep time with a blender or food processor
Unlike many other protein-based desserts, this one actually tastes like cheesecake—not a dense protein bar in disguise. The trick lies in using high-quality ingredients, gentle baking methods, and a proper chilling time.
Ingredients You’ll Need
This recipe is incredibly simple and requires only six ingredients. That’s right—just six!
Protein Cheesecake Filling:
-
24 oz cream cheese (or vegan cream cheese)
-
2 cups Greek yogurt (or dairy-free alternative like almond or coconut yogurt)
-
1/2 cup protein powder
Use unflavored or vanilla whey, casein, or plant-based powder. -
2/3 cup sweetener of choice
Great options include erythritol, monk fruit, coconut sugar, or a stevia blend. -
2 1/2 tsp pure vanilla extract
Optional Crust Ideas:
-
Almond flour crust: 1 ½ cups almond flour, 3 tbsp coconut oil or butter, 2 tbsp maple syrup or sweetener of choice
-
Graham cracker crust: 1 ½ cups crushed graham crackers, 1/3 cup butter, 2 tbsp sugar
-
Oat crust: 1 cup oats, 2 tbsp nut butter, 2 tbsp sweetener, splash of water to bind
Kitchen Equipment Needed
To make this protein cheesecake recipe, you’ll need the following:
-
9-inch springform pan
-
Blender, food processor, or electric beaters
-
Large mixing bowl (if not using a blender)
-
Measuring cups and spoons
-
Rubber spatula
-
Deep baking dish or roasting pan for the water bath
-
Oven and refrigerator
A springform pan is key for easy release and the iconic cheesecake shape. Don’t skip the water bath—it helps maintain that crack-free top and ultra-creamy texture.
Step-by-Step Instructions
-
Preheat your oven to 350°F (175°C).
Fill a deep baking dish about two-thirds with water and place it on the lower oven rack to create a moist baking environment. -
Bring the cream cheese to room temperature.
This helps ensure a smooth, lump-free batter. -
Prepare your crust (optional).
Press your chosen crust mixture into the bottom of a greased 9-inch springform pan. Pre-bake it at 350°F for 8–10 minutes, then cool. -
Blend the filling.
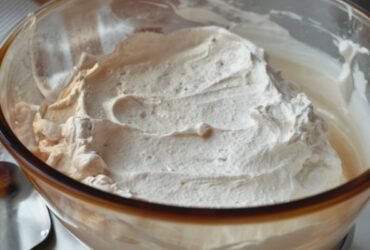
In a food processor, blender, or with electric beaters, blend the cream cheese, Greek yogurt, protein powder, sweetener, and vanilla until smooth. Do not overmix—just blend until combined and creamy. -
Pour the filling into your prepared pan and smooth the top with a spatula.
-
Bake the cheesecake on the center oven rack—above the rack holding the water pan—for 30 minutes.
Then turn off the oven (don’t open the door) and let it rest inside for 5 more minutes. -
Cool on the counter until it reaches room temperature. Then refrigerate for at least 6 hours, or overnight for best results. The cheesecake will firm up beautifully.
These gradual cooling steps prevent cracks and ensure the best texture. Don’t rush the chill time!
Storage Tips
This protein cheesecake keeps incredibly well, making it perfect for weekly meal prep or special occasions.
-
Refrigerator: Store covered for up to 5–6 days.
-
Freezer: Freeze slices individually wrapped in plastic wrap, then store in an airtight container for up to 2 months. Thaw overnight in the fridge before enjoying.
Variations & Flavor Additions
Looking to change things up? Here are a few creative twists:
-
Chocolate Protein Cheesecake: Use chocolate protein powder and add 2 tbsp cocoa powder.
-
Berry Swirl: Drop spoonfuls of raspberry or blueberry puree onto the top before baking and swirl with a knife.
-
Lemon Cheesecake: Add 2 tbsp fresh lemon juice and 1 tsp lemon zest for a zesty kick.
-
Pumpkin Cheesecake: Replace ½ cup yogurt with pumpkin puree and add 1 tsp pumpkin pie spice.
-
Mini Cheesecakes: Use a muffin tin lined with silicone or paper liners. Bake for 18–20 minutes.
What to Serve with Protein Cheesecake
Elevate your cheesecake experience with these delicious pairing ideas:
-
Fresh berries or fruit compote
-
Drizzle of almond or peanut butter
-
Chopped nuts or granola for crunch
-
Espresso or black coffee
-
A chilled glass of almond milk or unsweetened iced tea
This dessert is rich enough to stand on its own, but versatile enough to pair with anything from breakfast smoothies to evening tea.
Frequently Asked Questions (FAQ)
Can I make this without protein powder?
Yes! You can omit the protein powder, though the texture may be slightly softer. Reduce the yogurt slightly to compensate.
What’s the best protein powder to use?
Unflavored or vanilla whey, casein, or a neutral-tasting plant-based protein works best. Avoid powders with gums or added flavors if possible.
Will this taste like a traditional cheesecake?
Yes—especially if you use full-fat cream cheese and a smooth protein powder. The texture is rich and creamy, and the vanilla flavor is spot on.
Do I have to use a water bath?
It’s not strictly necessary, but it significantly improves texture and reduces cracking. For best results, use it.
Can I make it keto-friendly?
Yes! Use a keto-friendly sweetener like erythritol and opt for a low-carb crust or skip the crust altogether.
How long do I really need to chill it?
Minimum six hours, ideally overnight. Chilling helps the proteins set and gives you that perfect slice.
Final Thoughts: A Smarter Way to Enjoy Dessert
This Protein Cheesecake proves that indulgence and nutrition don’t have to be mutually exclusive. With simple, real ingredients and a foolproof method, it’s possible to enjoy your favorite dessert in a way that supports your goals and satisfies your cravings.
From holidays to weekly prep, this is one of those recipes you’ll come back to again and again—and your friends and family won’t even know it’s high-protein.
Loved this recipe? Don’t keep it to yourself! Share it with your fellow food lovers and fitness friends, and make sure to subscribe to the blog for more healthy dessert inspiration, meal prep tips, and crave-worthy clean recipes. Happy baking!





















Leave a Reply