How to Make Donuts at Home: The Only Guide You’ll Ever Need
There’s something magical about biting into a warm, freshly fried donut. That pillowy softness, the golden crunch, the delicate glaze that melts on your tongue—it’s pure bliss. While your local bakery might offer a tempting selection, nothing compares to the satisfaction of making homemade donuts from scratch. Whether you’re a baking enthusiast or just someone with a serious sweet tooth, this donut recipe will walk you step-by-step through creating your own sweet masterpiece right from the comfort of your kitchen.
Who This Recipe is For
This recipe is perfect for home bakers looking to elevate their kitchen skills, parents wanting a fun and delicious weekend project with the kids, or anyone craving a sweet treat that’s fresher and better than store-bought. You don’t need a pastry chef’s toolkit—just a few basic ingredients and a willingness to get your hands floury.
And if you’ve never made donuts before, don’t worry. This guide is beginner-friendly while still delivering professional-tasting results.
Ingredients You’ll Need
For the Dough:
-
1 cup whole milk
-
1/4 cup plus 1 tsp. granulated sugar, divided
-
1 packet (or 2 1/4 tsp.) active dry yeast
-
4 1/2 cups all-purpose flour, plus more for surface
-
1/2 tsp. kosher salt
-
6 Tbsp. butter, melted
-
2 large eggs
-
1/2 tsp. pure vanilla extract
-
Canola or vegetable oil, for frying
For the Glaze:
-
1/4 cup whole milk
-
2 cups powdered sugar
-
1/2 tsp. pure vanilla extract
Kitchen Equipment Needed
-
Large mixing bowls
-
Measuring cups and spoons
-
Wooden spoon
-
Microwave-safe measuring cup
-
Doughnut cutter or 3” and 1” biscuit cutters
-
Rolling pin
-
Dutch oven or heavy-bottomed pot
-
Slotted spoon or spider strainer
-
Cooling rack
-
Parchment paper
-
Paper towels
-
Cooking thermometer
Step-by-Step Instructions
Step 1: Activate the Yeast
In a microwave-safe cup, heat the milk until lukewarm—about 40 seconds. Stir in 1 tsp. of sugar to help activate the yeast, then sprinkle the yeast on top. Let it sit for around 8 minutes until it becomes frothy. This step ensures your donuts rise with the perfect texture.
Step 2: Make the Dough
In a large mixing bowl, combine the remaining sugar, melted butter, eggs, and vanilla. Stir with a wooden spoon until well blended. Pour in the activated yeast mixture.
In a separate bowl, whisk together the flour and salt. Gradually mix the dry ingredients into the wet, stirring until a shaggy dough forms. Transfer it to a floured surface and knead for about 5 minutes until the dough is soft, elastic, and just a bit tacky.
Step 3: First Rise
Form the dough into a ball and place it in a greased bowl. Cover it with a clean kitchen towel and let it rise in a warm place for 1 hour or until doubled in size.
Step 4: Cut the Donuts
Once risen, punch down the dough and roll it out on a floured surface to about ½” thickness. Use a donut cutter (or a 3” and 1” biscuit cutter) to cut out the donuts and holes. Place them on a parchment-lined baking sheet. Cover and let them rise again for another 40 minutes until puffy.
Step 5: Make the Glaze
While the donuts are on their second rise, whisk together the glaze ingredients in a bowl: whole milk, powdered sugar, and vanilla extract. Set aside.
Step 6: Fry the Donuts
In a Dutch oven, heat about 2 inches of oil to 350°F (use a thermometer to keep it precise). Fry the donuts in batches—about 1 minute per side until golden brown. The donut holes will cook even faster, so keep an eye on them.
Step 7: Glaze and Serve
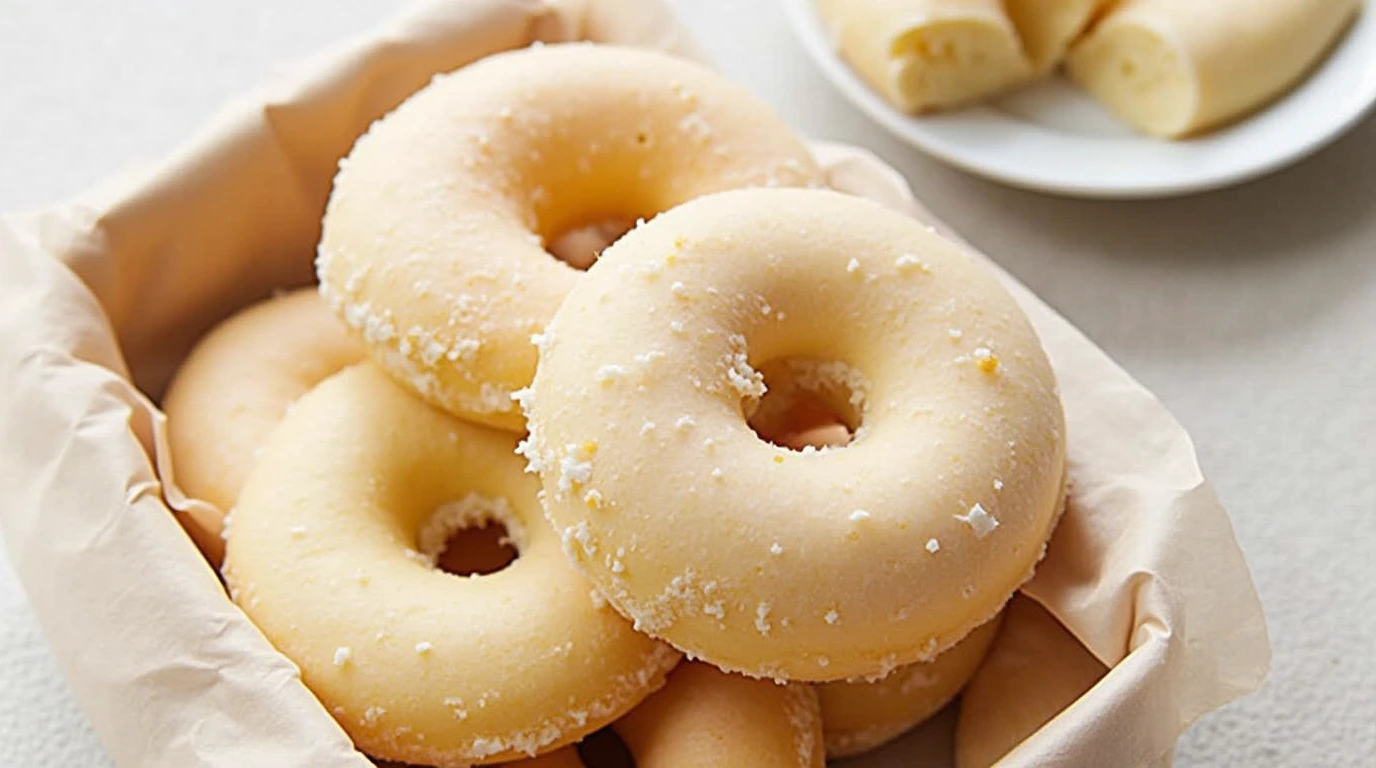
Transfer the donuts to a paper towel-lined sheet to drain slightly. While still warm, dip them into the glaze and let them rest on a wire rack to set. Or eat one immediately—no one’s judging.
Tips for the Best Homemade Donuts
-
Temperature Matters: Yeast is sensitive. Too hot, and you’ll kill it. Too cold, and it won’t activate. Aim for lukewarm (105–115°F) liquid.
-
Flour Gradually: Add flour slowly while kneading to prevent a dry dough. The goal is a soft, slightly tacky dough, not dry or crumbly.
-
Use a Thermometer: For perfectly fried donuts, maintain the oil temperature at 350°F. Too hot, and they burn outside but stay raw inside.
-
Don’t Overcrowd: Fry in small batches to maintain oil temperature and ensure even cooking.
-
Donut Holes Bonus: Don’t toss the cut-out holes! They fry faster and are just as delicious.
Recipe Swaps and Variations
-
Chocolate Glaze: Add 2 tablespoons of cocoa powder and a splash of espresso to the glaze for a mocha twist.
-
Maple Bacon: Mix a bit of maple syrup into the glaze and top with crumbled bacon for a sweet-salty combo.
-
Cinnamon Sugar: Skip the glaze and toss warm donuts in cinnamon sugar for a classic old-fashioned treat.
-
Filled Donuts: Instead of cutting holes, fry the donuts whole and fill them afterward with jam, custard, or Nutella using a piping bag.
How to Store Leftovers
Donuts are best enjoyed fresh, but if you must save them:
-
Room Temperature: Store in an airtight container for up to 2 days. Reheat in the microwave for 10–15 seconds to revive their softness.
-
Freeze: Freeze unglazed donuts in a single layer, then transfer to a freezer bag. To serve, thaw and reheat before glazing.
-
Avoid the Fridge: Refrigeration tends to dry out donuts quickly. Stick to room temp or freezer storage.
Food and Drink Pairings
Pair your homemade donuts with:
-
Coffee: A hot cup of black coffee balances the sweetness beautifully.
-
Hot Chocolate: Rich and indulgent, perfect for a cozy brunch.
-
Fresh Berries: Add a pop of freshness to your dessert spread.
-
Milkshakes: Go all in and dip your donut into a vanilla or chocolate shake!
Frequently Asked Questions (FAQ)
Q: Can I make the dough ahead of time?
A: Yes! Prepare the dough through the first rise, then refrigerate overnight. Let it come to room temperature before shaping and frying.
Q: What oil is best for frying?
A: Canola or vegetable oil are both neutral and have high smoke points, making them perfect for frying.
Q: Do I need a donut cutter?
A: Not necessarily. A 3” round biscuit cutter and a smaller cutter (like the lid of a spice jar) work just fine.
Q: Can I bake these instead of frying?
A: You can, but the texture will be more like a bread roll. Frying gives donuts their iconic crispy-golden exterior.
Q: How do I know the dough has risen enough?
A: It should double in size and feel puffy. Press your finger gently into the dough; if the indentation slowly springs back, it’s ready.
Final Thoughts
There’s something so rewarding about making your own donuts from scratch. The smell of fresh dough, the sizzle of hot oil, and the glossy finish of vanilla glaze—it’s a full sensory experience and one that you’ll want to repeat.
So the next time a donut craving hits, skip the trip to the bakery. Roll up your sleeves, get your hands floured, and treat yourself to the joy of homemade donuts.