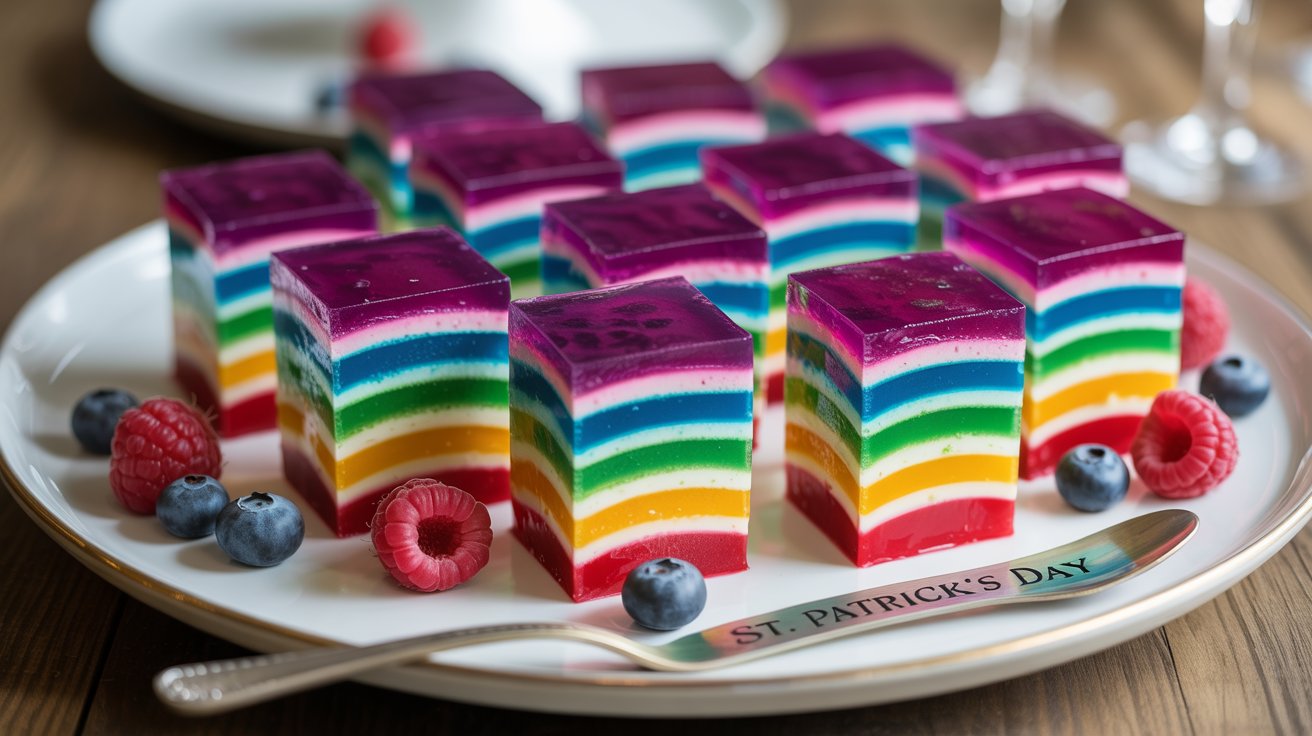
Layered Rainbow Jello – A St. Patrick’s Day Showstopper
If you’re searching for a festive, colorful, and crowd-pleasing dessert that dazzles both the eyes and the taste buds, look no further than this Layered Rainbow Jello! Especially perfect for St. Patrick’s Day celebrations, this treat is as fun to make as it is to eat. Each vibrant layer adds a splash of color, while creamy white gelatin layers in between provide a delicious balance and beautiful contrast.
This recipe is ideal for anyone who loves to create magical moments with food—whether you’re a parent preparing for a classroom party, a host looking to impress guests, or a food lover who appreciates a visually stunning dessert. Plus, kids absolutely adore the look and texture of rainbow Jello cubes, making this a family-friendly favorite.
Let’s dive into how you can make this deliciously layered masterpiece.
Why You’ll Love This Recipe
Layered Rainbow Jello isn’t just gorgeous—it’s nostalgic, refreshing, and surprisingly easy to make with just a bit of planning. Here’s why this recipe is a keeper:
-
Make-Ahead Friendly: Can be made up to 3 days in advance.
-
Customizable: Change the colors or flavors to match any holiday or event.
-
Fun Activity: A creative and rewarding kitchen project for adults and kids alike.
-
Perfect for Parties: Slice into bite-sized cubes that guests can pick up easily.
Ingredients for Layered Rainbow Jello
To create this rainbow magic, you’ll need:
-
▢ 6 different 3-oz Jello flavors (Berry Blue, Lime, Lemon, Orange, Grape, and Raspberry, Cherry, or Strawberry for red)
-
▢ 5 packages unflavored gelatin (such as Knox)
-
▢ 1 ½ (14-ounce) cans sweetened condensed milk
-
▢ 8 ½ cups water
Pro Tip: Use only name-brand gelatin when possible to ensure the best texture and vibrant color.
Kitchen Equipment You’ll Need
Here’s what you need to prep this layered treat:
-
9×13-inch glass or nonstick pan
-
Mixing bowls (heatproof)
-
Measuring cups and spoons
-
Small whisk or spoon for stirring
-
Kettle or pot to boil water
-
Paring knife (not serrated)
-
Small offset spatula or flat spatula for serving
-
Ladle or measuring cup with spout for pouring layers
Step-by-Step Instructions
1. Prepare the First Layer (Purple)
Start with the bottom layer:
-
Dissolve a 3-ounce package of grape Jello and 1 teaspoon unflavored gelatin (½ envelope) in 1 cup of boiling water.
-
Stir until fully dissolved, then pour into a 9×13-inch pan.
-
Place the pan in the fridge on a completely level surface.
-
Chill for 30 minutes or until fully set.
2. Prepare the White (Creamy) Layer
While the first layer sets:
-
Dissolve 2 teaspoons (1 envelope) of unflavored gelatin in 1 cup boiling water.
-
Stir in ½ can of sweetened condensed milk until well combined.
-
Let cool on the counter to room temperature (don’t let it set yet!).
3. Build the Rainbow
Once the purple layer has set:
-
Pour ¾ cup of the white gelatin over the purple layer, tilting the pan to spread evenly.
-
Return to the fridge for 20 minutes to let the white layer firm up.
-
Repeat this process with the remaining colored Jello in rainbow order: Blue (Berry Blue), Green (Lime), Yellow (Lemon), Orange, and Red (Raspberry or Strawberry), alternating with a white layer each time.
4. Repeat & Finish
-
Prepare each new color layer by dissolving 1 Jello pack and 1 teaspoon of unflavored gelatin in 1 cup of boiling water.
-
Let each colored layer cool slightly before pouring it over the previous white layer.
-
If your white mixture sets while waiting, make a fresh batch as needed following the same steps.
5. Slice and Serve
-
Once fully set (about 4–6 hours or overnight), use a paring knife to cut the Jello into 1-inch squares.
-
Use a small offset spatula to carefully lift out the cubes.
-
Arrange on a platter and serve chilled.
Storage Instructions
Layered Rainbow Jello can be stored in an airtight container in the fridge for up to 5 days. Keep it covered to prevent it from drying out or absorbing any fridge odors.
Tip: Do not freeze Jello. Freezing causes the gelatin to break down, resulting in an unpleasant texture when thawed.
Recipe Tips & Shortcuts
-
Shortcut Option: Only do three colors with white layers between to save time.
-
Flavor Swap: Feel free to use other Jello flavors or use sugar-free options.
-
Add Sparkle: Lightly sprinkle edible glitter or gold sugar for a magical touch.
-
Make it Irish: For a true St. Patrick’s Day vibe, skip the full rainbow and layer only green, white, and gold (lemon)!
Suggested Pairings
Rainbow Jello is sweet, fruity, and refreshing. Here’s what pairs well:
-
Drink Pairings: Sparkling water with citrus slices, mint lemonade, or for adults, a fruity sangria or prosecco.
-
Food Pairings: Light snacks like popcorn, finger sandwiches, or a spring salad.
-
Dessert Table Additions: Mini cupcakes, chocolate coins, or shamrock cookies.
Frequently Asked Questions (FAQ)
Q: Can I use sugar-free Jello?
A: Yes, sugar-free Jello works well in this recipe, though the final texture might be slightly different. Make sure the total water-to-Jello ratio remains consistent.
Q: How far in advance can I make this?
A: Up to 3 days in advance. Store tightly covered in the fridge.
Q: My layers mixed—what happened?
A: Make sure each layer is completely set before adding the next. Also, cool the hot gelatin to room temperature before pouring it over the set layer to avoid melting.
Q: Can I use flavored gelatin instead of the creamy white layer?
A: Absolutely! If you prefer all-fruit flavors, skip the condensed milk and use alternating Jello flavors for a simpler version.
Q: Can I use agar agar instead of gelatin?
A: Technically, yes, but the process will differ. Agar sets much faster and has a firmer texture, so you’ll need to experiment with ratios.
Final Thoughts
This Layered Rainbow Jello is more than just a dessert—it’s an experience. The vivid colors, nostalgic flavors, and creamy layers make it a true celebration centerpiece. Whether you’re serving it at a St. Patrick’s Day party or using it as a colorful addition to a springtime brunch, it’s guaranteed to make people smile.
If you loved this recipe, please share it with your friends and family, and don’t forget to subscribe to the blog for more festive, fun, and foolproof recipes. Happy layering!