No-Bake Mini Key Lime Pies: The Perfect Easy Dessert
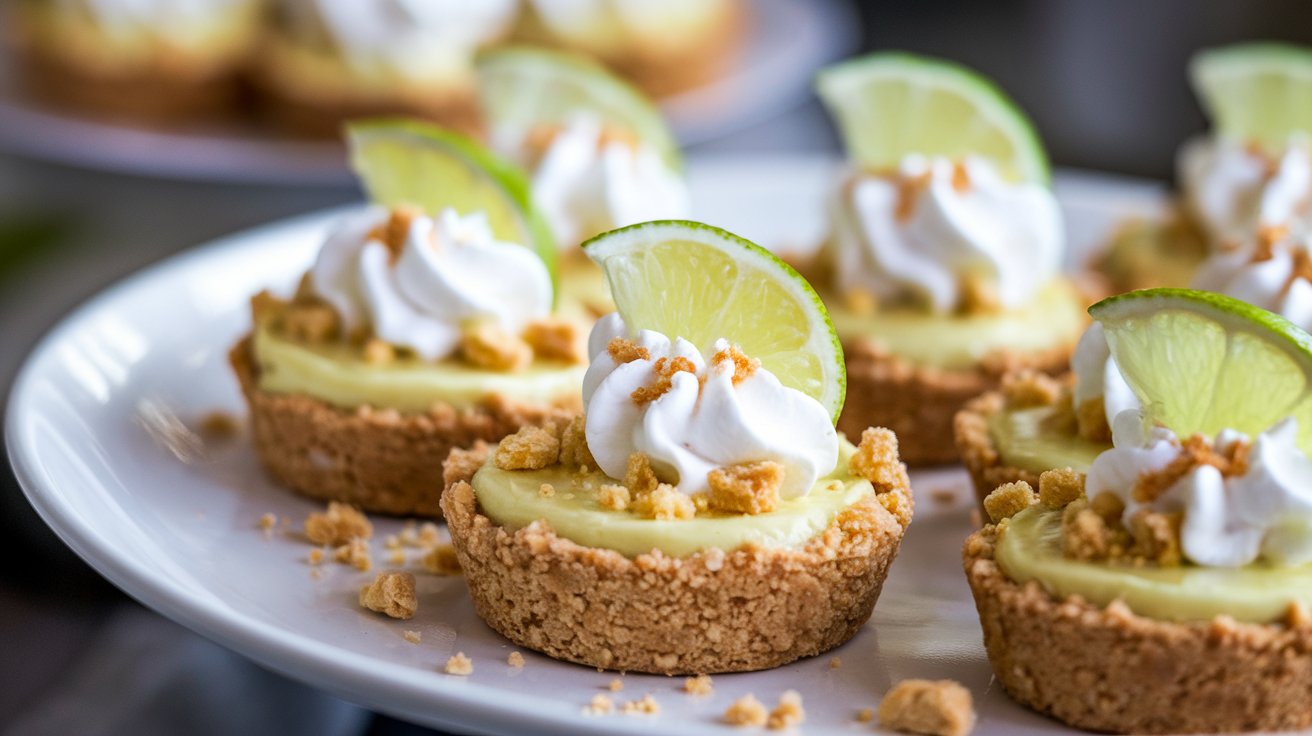
If you’re looking for a refreshing, no-fuss dessert that will wow guests and satisfy your sweet tooth, these No-Bake Mini Key Lime Pies are the answer. Creamy, tangy, and deliciously cool, these little pies deliver the iconic flavor of a classic Key lime pie in a simple, bite-sized format. Best of all, you won’t even need to turn on your oven — making them perfect for warm-weather entertaining or any time you need a stress-free treat!
Let’s walk through how to make these dreamy mini pies, plus essential tips, fun variations, and FAQs to guarantee perfect results every time.
Why You’ll Love These No-Bake Mini Key Lime Pies
These mini pies are made for anyone who loves the bright, tropical taste of Key lime pie but wants an easier, quicker method. With no baking required, they come together fast and chill to perfection in just a few hours. They’re great for:
-
Summer parties and backyard barbecues
-
Bridal or baby showers
-
Holidays when your oven is already packed
-
Weeknight desserts when you want something special with minimal effort
Because they’re served individually, they’re a charming option for events — no messy slicing required!
Ingredients You’ll Need
For the Crust:
-
Graham cracker crumbs
-
Granulated sugar
-
Unsalted butter, melted
For the Key Lime Filling:
-
Sweetened condensed milk
-
Cream cheese, softened
-
Fresh key lime juice (or regular lime juice)
-
Key lime zest
For Garnish:
-
Whipped cream
-
Optional: lime slices or additional zest for topping
Kitchen Equipment Needed
Making these mini pies is simple, and you’ll only need a few tools:
-
Medium mixing bowl
-
Large mixing bowl
-
Hand or stand mixer
-
Whisk
-
Rubber spatula
-
Muffin tin with cupcake liners OR mini tart pans
-
Measuring cups and spoons
-
Microplane or fine grater (for zesting)
Step-by-Step Instructions
1. Prepare the Crust
Mix the Ingredients
In a medium bowl, combine graham cracker crumbs, granulated sugar, and melted butter. Stir until the texture resembles wet sand.
Form the Crusts
Spoon the crust mixture into 6–8 mini tart pans or a muffin tin lined with cupcake liners. Use the back of a spoon or the bottom of a glass to press the crumbs tightly into the base and slightly up the sides. Chill the crusts in the refrigerator for at least 15–20 minutes to firm up.
2. Make the Filling
Whisk the Key Lime Base
In a large bowl, whisk together the sweetened condensed milk, softened cream cheese, lime juice, and lime zest until smooth and creamy. No lumps should remain — you want a silky filling!
Whip the Cream
In a separate bowl, whip heavy cream and a bit of powdered sugar until stiff peaks form. This step adds airiness to the final texture.
Fold the Cream
Gently fold half of the whipped cream into the key lime mixture to lighten it, then fold in the rest. Be careful not to deflate the mixture.
3. Assemble the Pies
Fill the Crusts
Spoon the key lime filling into the prepared crusts, smoothing the tops with a spatula.
Chill
Refrigerate the mini pies for at least 2–3 hours, or until set. Overnight chilling works great if you’re preparing ahead.
4. Garnish and Serve
Top each mini pie with a dollop of whipped cream, a thin slice of lime, or a sprinkle of lime zest just before serving.
Expert Tips and Tricks
-
Use Fresh Lime Juice: Bottled juice can taste bitter. Fresh key limes (or even Persian limes) make all the difference!
-
Crush Graham Crackers Quickly: Use a food processor for fine crumbs, or place crackers in a zip-top bag and crush with a rolling pin.
-
Compact the Crust Well: This ensures the crust holds together when you remove the pies from the tin.
-
Room Temperature Cream Cheese: Softened cream cheese blends more easily, preventing lumps.
-
Don’t Skip the Chill Time: The pies need time to firm up properly; rushing this step can result in runny filling.
Fun Variations
-
Tropical Twist: Add a splash of coconut milk to the filling for a tropical flair.
-
Chocolate Crust: Swap graham crackers for crushed chocolate wafers for a chocolate-lime flavor combo.
-
Berry Burst: Top with fresh raspberries or blueberries for extra color and flavor.
-
Mini Cheesecake Cups: Add a layer of crushed vanilla cookies instead of graham crackers for a cheesecake-style mini pie.
Storing Leftovers
These mini pies store beautifully:
-
Refrigerate: Store covered in the refrigerator for up to 4–5 days.
-
Freeze: For longer storage, freeze the pies uncovered until solid, then transfer to an airtight container or freezer bag. They’ll keep for about 1 month. Thaw in the fridge before serving.
-
Tip: If freezing, add fresh whipped cream topping after thawing for the best texture.
Food and Drink Pairings
Pair these refreshing pies with:
-
Drinks: Iced tea, mojitos, or sparkling water with lime
-
Snacks: A platter of tropical fruit like pineapple and mango
-
Meals: Light meals such as grilled fish, chicken tacos, or summer salads
Their tartness makes them the perfect finish to a rich or spicy meal!
FAQs
Can I use regular limes instead of key limes?
Yes! Key limes have a distinct, slightly floral flavor, but regular limes work beautifully if key limes are unavailable.
Can I make these pies ahead of time?
Absolutely! They’re a fantastic make-ahead dessert. Prepare and chill them up to 24 hours in advance, then garnish just before serving.
What can I use if I don’t have mini tart pans?
A muffin tin lined with cupcake liners is a great substitute and makes removing the pies super easy.
Can I make this recipe gluten-free?
Definitely! Simply use gluten-free graham crackers for the crust.
Is there a dairy-free version?
You can substitute dairy-free cream cheese and whipped coconut cream for a delicious non-dairy alternative. Use sweetened condensed coconut milk for the filling.
Final Thoughts
These No-Bake Mini Key Lime Pies are pure magic in dessert form — light, creamy, tangy, and so easy to make. Perfect for beginners and seasoned bakers alike, they bring sunshine to your table no matter the season.
If you loved this recipe, don’t forget to share it with your friends and subscribe to the blog for more delicious, easy-to-follow recipes and tips straight to your inbox. Happy no-baking!


















Leave a Reply