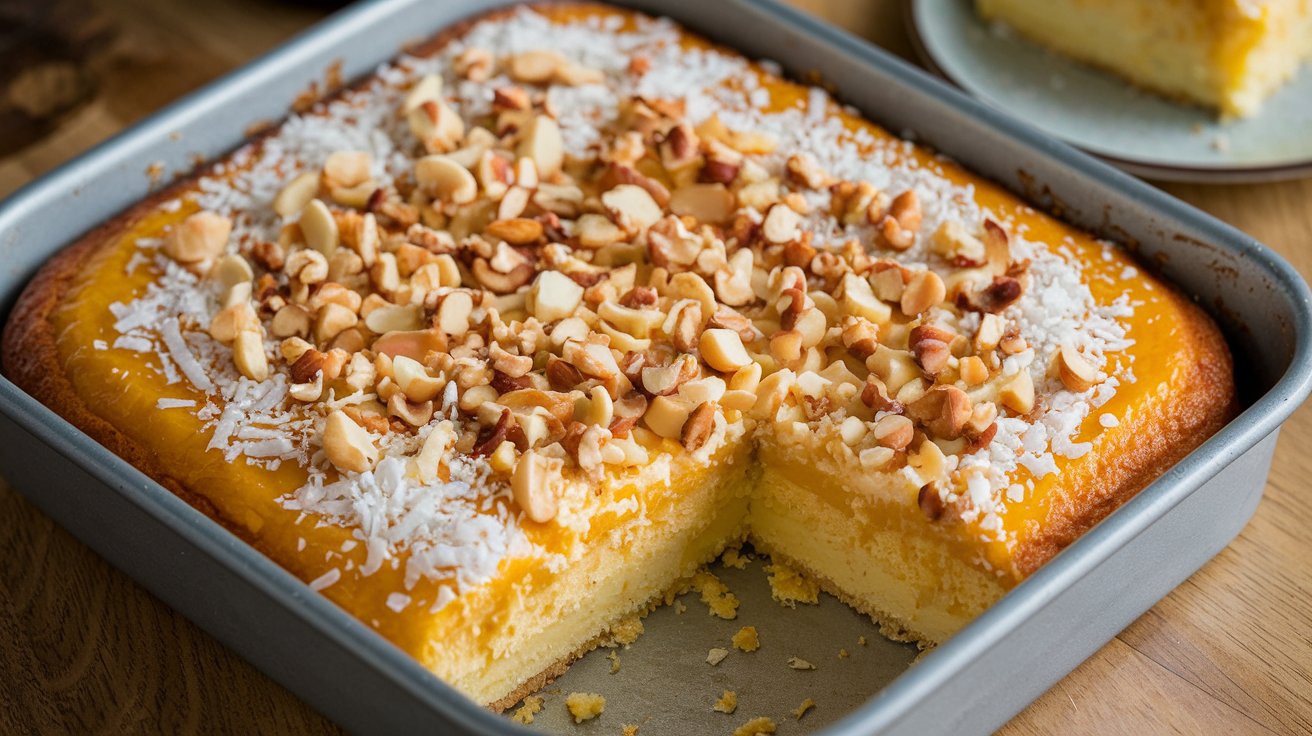
Pineapple Condensed Milk Cake: A Sweet, Tropical Delight You’ll Make Again and Again
If you’re looking for a dessert that’s effortlessly elegant, unapologetically indulgent, and packed with tropical flavor, then look no further than this Pineapple Condensed Milk Cake. This simple yet decadent treat combines the luscious richness of sweetened condensed milk with the bright, fruity burst of crushed pineapple—all nestled atop a moist yellow cake base. Whether you’re entertaining guests, bringing a dish to a potluck, or treating yourself to something sweet and satisfying, this cake is sure to please.
Why You’ll Love This Recipe
This Pineapple Condensed Milk Cake is perfect for:
-
Busy bakers looking for an easy, crowd-pleasing dessert.
-
Tropical flavor lovers who crave pineapple, coconut, and buttery goodness.
-
Beginner bakers who want to impress with a foolproof and delicious cake.
-
Potluck stars and family gathering heroes who need a dessert that holds up beautifully.
The beauty of this recipe lies in its simplicity. With pantry staples and just a few steps, you can create a cake that tastes like you spent hours baking it from scratch. The sweetened condensed milk adds a creamy, custard-like richness while the pineapple gives the cake a juicy tang that balances the sweetness perfectly.
Ingredients You’ll Need
-
1 box yellow cake mix – Choose your favorite brand. This forms the base of the cake and provides a soft, moist texture.
-
1 can (14 oz) sweetened condensed milk – Adds luxurious sweetness and richness.
-
1 can (20 oz) crushed pineapple, drained – Brings tropical brightness and texture.
-
1/2 cup unsalted butter, melted – Infuses the cake with buttery flavor and helps with moisture.
-
1 cup shredded coconut – Adds chewiness and a touch of exotic flavor.
-
1 cup chopped nuts (optional, such as walnuts or pecans) – For crunch and a toasty, nutty contrast.
Kitchen Equipment You’ll Need
-
9×13 inch baking dish
-
Mixing bowls (at least two)
-
Measuring cups and spoons
-
Whisk or hand mixer
-
Rubber spatula
-
Toothpick (for doneness testing)
-
Wire rack (for cooling)
-
Knife and serving spatula
Step-by-Step Instructions
1. Preheat and Prepare
Set your oven to 350°F (175°C). Grease and flour a 9×13 inch baking dish, or use non-stick cooking spray for an easy release.
2. Make the Cake Mix
Prepare the yellow cake mix according to the package directions. Most boxed mixes will require eggs, oil, and water—be sure to check the back of the box. Pour the batter evenly into your prepared baking dish.
3. Create the Pineapple Mixture
In a separate mixing bowl, combine the sweetened condensed milk, crushed (and drained) pineapple, and melted butter. Stir until everything is well incorporated.
4. Assemble the Cake
Pour the pineapple mixture over the top of the cake batter. Don’t worry about mixing it in—it will sink in beautifully as it bakes. Sprinkle the shredded coconut over the top, followed by the chopped nuts if you’re using them.
5. Bake
Place the baking dish in your preheated oven and bake for 40–45 minutes, or until the top is golden brown and a toothpick inserted into the center comes out clean.
6. Cool and Serve
Let the cake cool completely in the pan on a wire rack. Once cool, slice and serve. For an extra-decadent twist, top each slice with whipped cream or even a scoop of vanilla ice cream.
Tips for the Best Pineapple Condensed Milk Cake
-
Drain the pineapple well. Excess juice can make the cake soggy. Press the pineapple lightly with a spoon in a sieve to remove moisture.
-
Toast the coconut before adding it to the top for a richer, nuttier flavor.
-
Use parchment paper for easy removal if you’re transferring the cake from the pan.
-
Add a pinch of salt to the pineapple mixture to balance out the sweetness.
Easy Recipe Variations
-
Tropical Twist: Swap out the yellow cake mix for coconut or pineapple-flavored cake mix for even more island vibes.
-
No Nuts? No Problem! Leave them out entirely or replace them with dried fruit like chopped dates or raisins.
-
Make It Boozy: Add a splash of rum or coconut liqueur to the pineapple mixture for a grown-up version.
-
Layer It Up: Slice the finished cake horizontally and layer with whipped cream or cream cheese frosting for a fancier presentation.
How to Store Pineapple Condensed Milk Cake
Refrigeration
Because of the dairy content, this cake stores best in the refrigerator. Cover tightly with plastic wrap or store in an airtight container for up to 5 days.
Freezing
You can freeze the cake for up to 3 months. Wrap individual slices in plastic wrap and then foil for best results. Thaw overnight in the refrigerator before serving.
Perfect Pairings
-
Drink Pairings: Try serving this cake with an iced coconut latte, pineapple juice, or a chilled glass of Riesling or Moscato.
-
Meal Pairings: Serve after a spicy meal like jerk chicken, grilled seafood, or BBQ pork to cool the palate with something sweet and fruity.
-
Topping Ideas: Whipped cream, fresh pineapple chunks, or even a dollop of Greek yogurt can elevate this cake further.
FAQs About Pineapple Condensed Milk Cake
Q: Can I make this ahead of time?
A: Absolutely! This cake tastes even better the next day as the flavors have time to meld. Perfect for making ahead for parties or gatherings.
Q: Can I use fresh pineapple instead of canned?
A: You can, but you’ll need to finely crush it and be sure to drain it thoroughly. Fresh pineapple may be juicier, so keep an eye on the bake time.
Q: What if I don’t have shredded coconut?
A: You can skip it, or substitute with flaked coconut or even white chocolate chips for a different texture and flavor.
Q: Can I make this gluten-free?
A: Yes! Just swap the yellow cake mix for your favorite gluten-free boxed mix and double-check that your other ingredients are gluten-free.
A Slice of the Tropics, Right From Your Oven
This Pineapple Condensed Milk Cake is one of those magical recipes that hits every note: sweet, moist, rich, fruity, and just a little bit nutty. Whether you’re making it for a family celebration or just because you deserve something indulgent, this cake never disappoints.
It’s fast, easy, and totally drool-worthy—and now, it’s your turn to try it!
If you loved this recipe, don’t forget to share it with your friends and family on social media. And while you’re here, be sure to subscribe to the blog for more deliciously simple desserts, straight to your inbox!