Thai Peanut Roasted Whole Cauliflower – A Bold, Flavor-Packed Plant-Based Showstopper
If you’re craving a centerpiece dish that’s plant-based, full of flavor, and downright stunning, look no further than this Thai Peanut Roasted Whole Cauliflower. This recipe is a harmony of creamy peanut butter, umami-rich soy sauce, zesty ginger, and spicy sriracha—all baked and broiled into a golden, caramelized glaze over a tender cauliflower head. Whether you’re vegan, gluten-free, or just looking to mix up your meatless meals, this dish delivers maximum flavor with minimal fuss.
Why You’ll Love This Recipe
This whole roasted cauliflower isn’t just a recipe; it’s an experience. From its golden, lacquered crust to the satisfying cut into a tender floret, this dish checks all the boxes: beautiful presentation, complex flavors, simple ingredients, and crowd-pleasing appeal. It’s ideal for:
-
Dinner party hosts seeking an elegant vegetarian entrée
-
Health-conscious eaters who love whole foods with global flavors
-
Busy home cooks wanting a make-ahead or sheet-pan-friendly option
-
Anyone trying to eat more plants—without sacrificing flavor
With a bold Thai-inspired peanut sauce and a perfectly roasted texture, this recipe might just become your next weeknight or weekend favorite.
Ingredients You’ll Need
Let’s break down what goes into making this flavor-packed cauliflower:
-
1/2 cup smooth, creamy peanut butter – The base of the rich, nutty sauce.
-
1/4 cup liquid aminos or gluten-free soy sauce – Brings that umami punch.
-
1/4 cup honey or agave (or sugar-free honey) – Adds just the right touch of sweetness.
-
6 tbsp mild-tasting oil – Think avocado, grapeseed, or olive oil.
-
4 tbsp toasted sesame oil – For that deep, nutty, signature Asian flavor.
-
2 tbsp fresh grated ginger – Adds brightness and zing.
-
2-4 tsp sriracha – Adjust to your spice tolerance.
-
1 whole head of cauliflower – Choose a firm, medium-to-large head.
-
Optional Garnishes:
-
2 tbsp chopped green onions
-
2 tbsp chopped salted peanuts
-
Extra sriracha for drizzling
-
Step-by-Step Instructions
1. Preheat and Prep
Preheat your oven to 400°F (200°C). While the oven warms up, prepare your sauce by whisking together peanut butter, soy sauce, honey/agave, oils, ginger, and sriracha in a bowl. Mix until it becomes smooth and pourable.
2. Prepare the Cauliflower
Remove the green leaves and trim the stem of the cauliflower so it sits flat in your baking pan. This not only helps with even cooking but also enhances presentation.
3. Brush with Sauce
Place the cauliflower in a cast iron skillet or oven-safe baking dish. Brush it generously with the sauce, making sure to coat all sides. Cover with foil.
4. Bake Until Tender
Roast the covered cauliflower for 40–50 minutes. It should be fork-tender—easily pierced with a knife.
5. Broil and Glaze
Remove the foil. Brush on another layer of sauce, then broil for 2–4 minutes. Repeat this process two more times: brush, broil, repeat. This builds a rich, thick glaze that caramelizes beautifully.
6. Final Touches
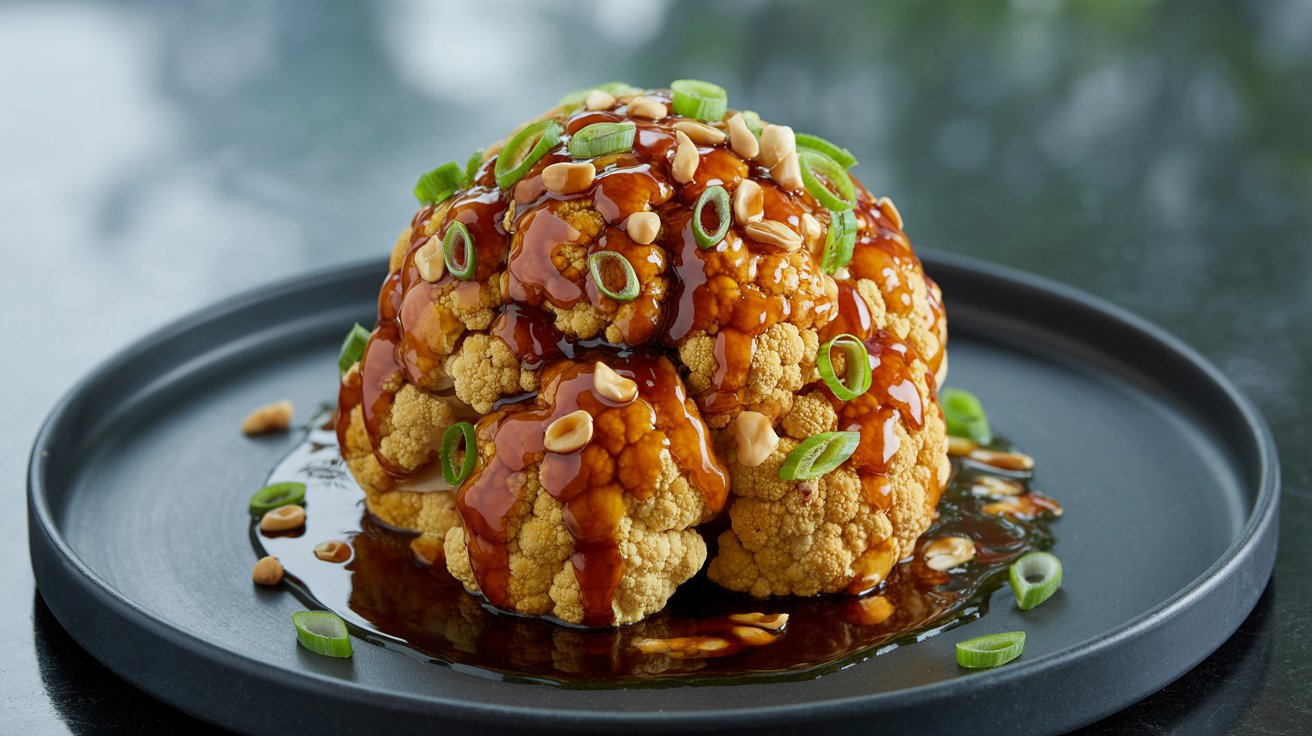
After the final broil, give it one more brush of sauce and top with green onions, chopped peanuts, and a drizzle of sriracha if you like extra heat.
Kitchen Equipment Needed
-
Cast iron skillet or oven-safe baking dish
-
Small mixing bowl
-
Whisk
-
Pastry brush for glazing
-
Aluminum foil
-
Knife and cutting board
Recipe Tips and Tricks
-
Short on time? Steam the cauliflower head for 5–7 minutes before roasting to reduce oven time.
-
Low-sugar version? Use sugar-free honey or a keto-friendly sweetener like monk fruit syrup.
-
Nut-free version? Sub sunflower seed butter or tahini for peanut butter.
-
Extra crispy edges? After the final broil, let the cauliflower sit under the broiler for an extra minute or two—just watch it carefully to prevent burning.
Serving Suggestions
Pair your Thai Peanut Roasted Cauliflower with:
-
Steamed jasmine or brown rice for a satisfying meal
-
Chilled cucumber salad with lime and cilantro for contrast
-
Thai iced tea or a crisp dry white wine like Riesling or Sauvignon Blanc
-
Crunchy slaw with lime vinaigrette as a refreshing side
This dish is also a fantastic meatless Monday star or holiday main course for plant-forward celebrations.
How to Store Leftovers
This cauliflower stores beautifully and reheats well. To store:
-
Refrigerate: Place leftovers in an airtight container for up to 4 days.
-
Reheat: Warm in the oven at 350°F (175°C) for 10–15 minutes or microwave individual servings.
-
Pro Tip: For a quick lunch, chop up leftover cauliflower and toss with cooked rice or noodles and fresh herbs.
FAQs
Can I make this ahead of time?
Yes! You can prep the sauce and cauliflower a day in advance. Roast the cauliflower as directed, then cool and refrigerate. When ready to serve, reheat and apply the final broil and sauce layers.
Is this recipe vegan?
It can be! Just use agave syrup or maple syrup instead of honey.
What’s a good substitute for sriracha?
Try sambal oelek, chili garlic sauce, or a few dashes of hot sauce of your choice.
Can I use frozen cauliflower?
This recipe works best with fresh whole cauliflower for structure and roasting. Frozen florets are better for stir-fries or soups.
Can I turn this into a bowl meal?
Absolutely. Roast the cauliflower, then chop and serve over rice, quinoa, or noodles with extra sauce and toppings.
Final Thoughts
If you’ve never roasted a whole cauliflower before, let this Thai Peanut Roasted Whole Cauliflower be your gateway into a world of show-stopping plant-based dishes. It’s beautiful, simple to prepare, and bursting with spicy-sweet-savory flavor. The bold Thai-inspired sauce transforms humble cauliflower into a dish worthy of any table—weekday or special occasion alike.
Loved this recipe? Share it with your foodie friends, pin it to your favorite Pinterest board, and tag us on social media when you make it! Don’t forget to subscribe to our blog for more globally-inspired, plant-forward recipes that are easy to love and even easier to cook.
Let us know in the comments—how did your cauliflower turn out?