Chocolate Blossom Cookies – A Classic Treat for Every Occasion
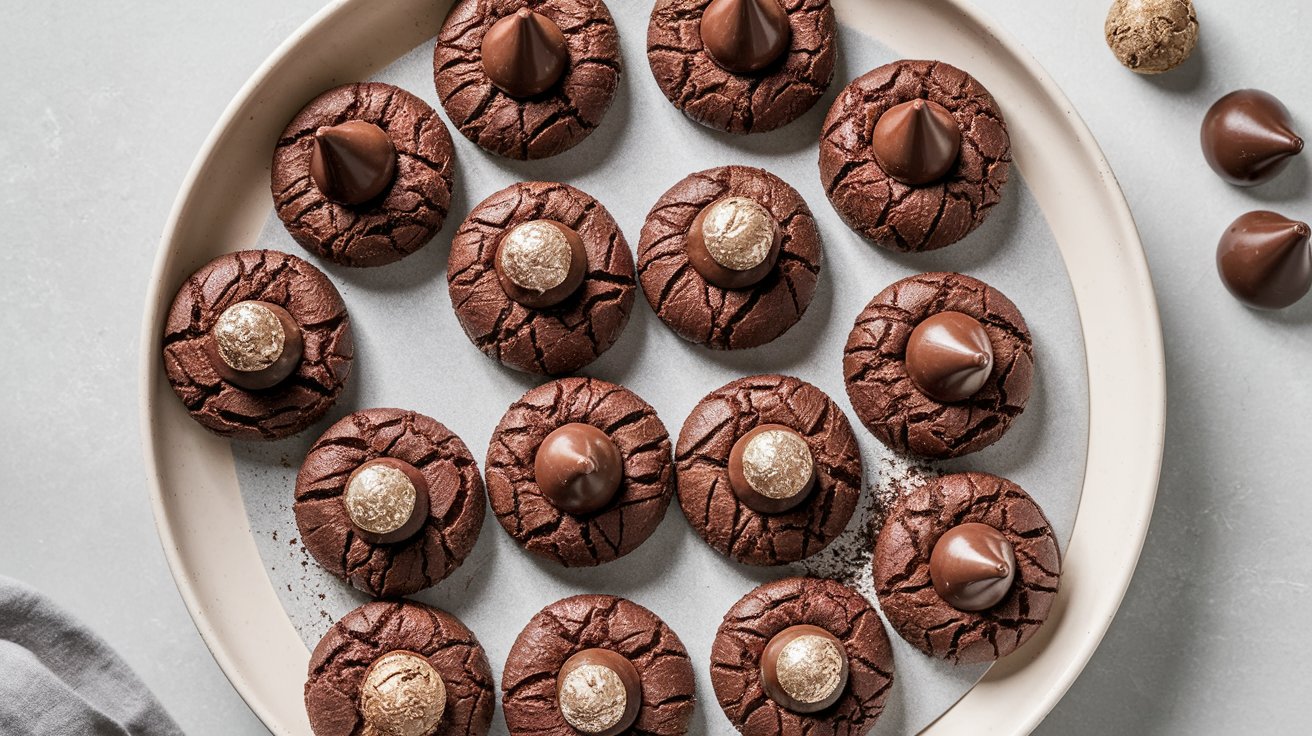
Chocolate Blossom Cookies are a delightful twist on the traditional peanut butter blossom cookies. These soft, chocolatey treats are rolled in sugar and topped with a rich chocolate kiss, making them a perfect addition to holiday cookie trays, bake sales, or just a sweet treat to enjoy at home. Whether you’re a seasoned baker or a beginner in the kitchen, this recipe is simple to follow and produces consistently delicious results.
Why You’ll Love This Recipe
These cookies are a dream come true for chocolate lovers. They have a deep cocoa flavor, a slightly chewy texture, and a sweet chocolate kiss right in the center. Plus, they’re easy to customize with different variations (which we’ll cover later in the post). Here’s why you should give them a try:
- Rich & Chocolatey – A blend of cocoa powder and melted chocolate creates an indulgent taste.
- Easy to Make – Simple ingredients and straightforward steps make this a beginner-friendly recipe.
- Great for Gifting – These cookies look as good as they taste, making them perfect for cookie swaps and holiday tins.
- Kid-Friendly – Fun to make and even more fun to eat!
Ingredients
Before you start baking, gather these simple ingredients:
- ¾ cup unsalted butter (softened to room temperature)
- ½ cup brown sugar
- ¾ cup sugar (divided)
- 1 large egg (room temperature)
- 1 teaspoon vanilla extract
- ½ teaspoon salt
- 1 ½ teaspoons baking powder
- ¼ cup unsweetened cocoa powder
- 2 oz semi-sweet chocolate chips (melted)
- 2 cups all-purpose flour
- 20 chocolate kisses (for topping, unwrapped)
Kitchen Equipment Needed
Here’s what you’ll need to make these cookies:
- Stand mixer or hand mixer – Helps to cream butter and sugar.
- Mixing bowls – For combining ingredients.
- Measuring cups and spoons – Ensures accuracy.
- Baking sheet – To bake the cookies.
- Parchment paper or nonstick spray – Prevents cookies from sticking.
- Cookie scoop or spoon – For evenly shaped dough balls.
- Cooling rack – To let cookies set properly.
Step-by-Step Instructions
1. Prepare the Oven and Baking Sheet
Preheat your oven to 350°F (175°C). Line a baking sheet with parchment paper or spray with nonstick cooking spray.
2. Make the Dough
In a large mixing bowl, cream together the butter, brown sugar, and ½ cup of the granulated sugar until light and fluffy. Use a stand mixer or hand mixer for the best results.
Add the egg, vanilla extract, salt, and baking powder. Mix until combined.
Next, add the cocoa powder and melted semi-sweet chocolate chips, stirring until smooth.
Gradually mix in the flour, ½ cup at a time, until fully incorporated. The dough should be thick but pliable.
3. Chill the Dough
Allow the dough to chill for 10-15 minutes in the refrigerator. This makes it easier to handle and prevents the cookies from spreading too much while baking.
4. Shape and Bake the Cookies
Scoop out portions of the dough and roll into balls. Roll each ball in the remaining ¼ cup of sugar before placing them on the prepared baking sheet.
Bake for 10 minutes, or until the edges are set but the centers are still soft.
5. Add the Chocolate Kiss
As soon as the cookies come out of the oven, press an unwrapped chocolate kiss into the center of each one. The residual heat will slightly melt the base of the chocolate, helping it adhere to the cookie.
6. Cool and Enjoy
Transfer cookies to a wire rack and allow them to cool completely so the chocolate can set. Then, dig in and enjoy!
Tips & Variations
1. Ingredient Substitutions
- Dark Chocolate Variation: Swap semi-sweet chocolate chips for dark chocolate chips to intensify the flavor.
- Peppermint Twist: Use peppermint-flavored chocolate kisses for a festive touch.
- Nutty Addition: Mix in ½ cup of finely chopped nuts for added crunch.
- Espresso Kick: Add ½ teaspoon of instant espresso powder to deepen the chocolate flavor.
2. How to Store Chocolate Blossom Cookies
- Room Temperature: Store in an airtight container for up to 5 days.
- Refrigerator: If you prefer firmer cookies, store them in the fridge for up to 1 week.
- Freezing: Place cookies in a single layer in an airtight container and freeze for up to 3 months. Thaw at room temperature before serving.
Best Pairings for Chocolate Blossom Cookies
These cookies are delicious on their own, but here are some great pairings:
- A Glass of Cold Milk – A classic combination that never fails.
- Hot Coffee or Espresso – The slight bitterness enhances the chocolate.
- Vanilla Ice Cream – Create a delicious cookie sandwich by placing ice cream between two cookies.
- Hot Cocoa – A fun, chocolate-on-chocolate experience.
Frequently Asked Questions
1. Can I Make These Cookies Ahead of Time?
Yes! You can refrigerate the dough for up to 48 hours before baking. You can also freeze the dough balls and bake them straight from frozen—just add an extra 1-2 minutes to the baking time.
2. My Cookies Spread Too Much. What Happened?
This could be due to not chilling the dough long enough. Make sure to chill it for at least 10-15 minutes before baking.
3. Can I Use Different Types of Chocolate Kisses?
Absolutely! Try using caramel-filled, mint, or white chocolate kisses for a fun twist.
4. How Do I Get a Soft and Chewy Texture?
To achieve the perfect chewy texture, avoid overbaking. The cookies will continue to firm up as they cool.
Try This Recipe Today!
These Chocolate Blossom Cookies are easy, delicious, and perfect for any occasion. Whether you make them for a holiday, a bake sale, or a simple treat, they’re sure to be a hit!
If you loved this recipe, don’t forget to share it with friends and family and subscribe to our blog for more amazing dessert ideas!