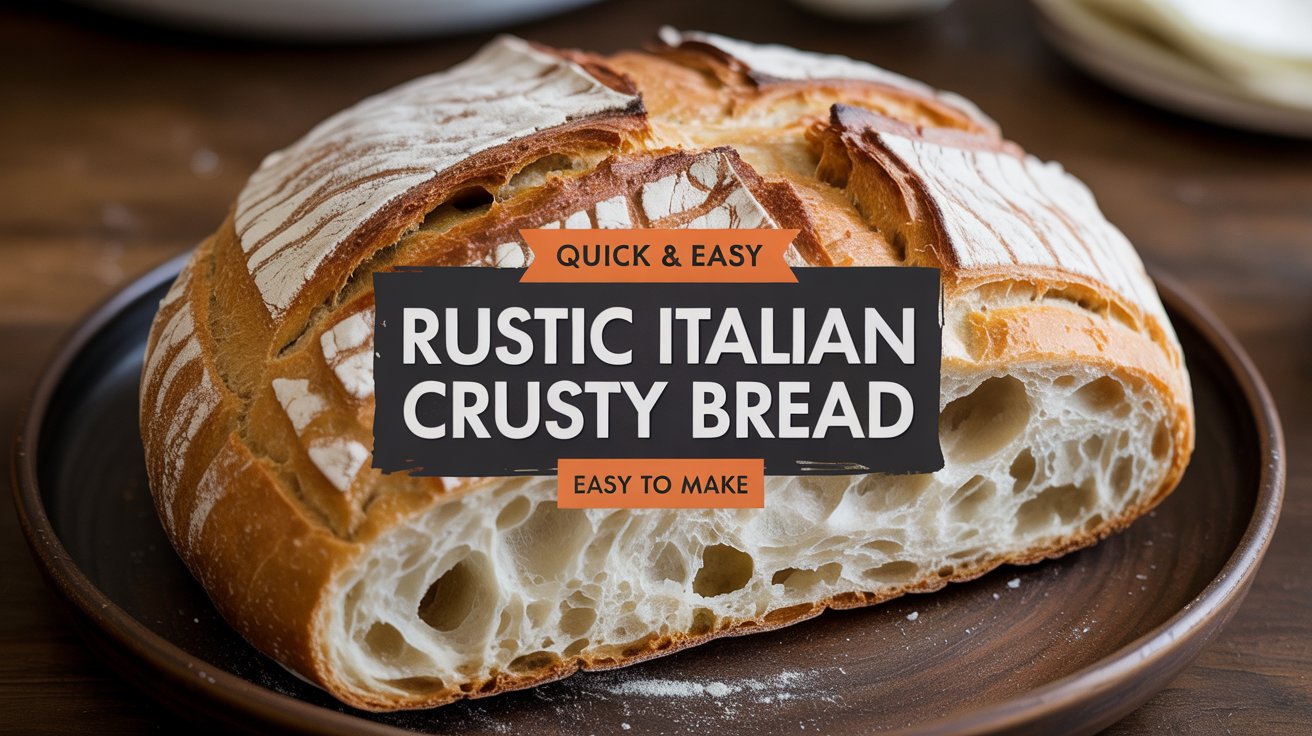
There’s nothing quite like the aroma of freshly baked bread wafting through your home—a comforting, timeless scent that brings everyone together. Rustic Italian Crusty Bread is a classic recipe that embodies the heart and soul of traditional Italian baking. With a crunchy, golden-brown crust and a tender, airy interior, this bread is perfect for dipping in olive oil, serving alongside your favorite pasta, or simply enjoying on its own. In this detailed guide, we’ll explore every step of making this delicious bread from scratch, share valuable tips and variations, and provide storage suggestions and food pairing ideas. Whether you’re an experienced baker or a beginner, you’ll find this recipe both accessible and deeply rewarding.
Why You’ll Love This Rustic Italian Crusty Bread
Authentic Flavors
Rustic Italian Crusty Bread is a celebration of simple ingredients and time-honored techniques. The blend of high-quality flour, yeast, and water creates a dough that transforms into a golden masterpiece with a satisfying crunch on the outside and a light, chewy interior.
Versatility
This bread is incredibly versatile. Enjoy it as a side with your pasta dishes, use it to make hearty sandwiches, or serve it as an appetizer with a drizzle of extra virgin olive oil and a sprinkle of sea salt. Its robust flavor makes it a perfect match for both traditional and modern dishes.
Homemade Satisfaction
There’s something truly special about making bread at home. The process of activating the yeast, kneading the dough, and watching it rise creates a sense of accomplishment that no store-bought loaf can match. Plus, the taste of fresh, homemade bread is unparalleled.
Ideal for Any Occasion
Whether you’re hosting a family dinner, planning a picnic, or simply craving a warm slice of bread with your meal, this rustic Italian bread is sure to impress. Its artisanal quality makes every meal feel like a special occasion.
Ingredients and Essential Kitchen Equipment
Ingredients
For this Rustic Italian Crusty Bread, you will need:
- 3 1/2 cups all-purpose or bread flour
The base of your dough, providing structure and texture. - 1 1/2 teaspoons salt
Essential for flavor and for strengthening the gluten in the dough. - 1 teaspoon sugar
Helps to feed the yeast and adds a touch of sweetness. - 1 packet (2 1/4 teaspoons) instant yeast
The leavening agent that makes your bread rise. - 1 1/4 cups warm water (110°F to 115°F)
The ideal temperature to activate the yeast without killing it.
Essential Kitchen Equipment
To ensure a smooth baking process, have these tools ready:
- Small Mixing Bowl: For activating the yeast.
- Large Mixing Bowl: For combining flour, salt, and the yeast mixture.
- Wooden Spoon or Spatula: For stirring the dough until a shaggy ball forms.
- Stand Mixer with Dough Hook (optional): For a hands-off kneading process.
- Clean, Lightly Floured Surface: For kneading the dough.
- Kitchen Towel: For covering the dough during its rise.
- Oven: Preheated to 450°F with a Dutch oven or baking stone inside.
- Dutch Oven or Baking Stone: To create a steamy, enclosed environment for baking, resulting in a perfect crust.
- Parchment Paper: To transfer the dough safely into the Dutch oven.
- Cooling Rack: For cooling the bread after baking.
Step-by-Step Recipe Instructions
1. Activate the Yeast
In a small bowl, combine 1 1/4 cups of warm water, 1 teaspoon of sugar, and 1 packet (2 1/4 teaspoons) of instant yeast. Stir gently and let the mixture sit for 5 to 10 minutes until it becomes foamy. This foaming action indicates that the yeast is active and ready to work its magic in your dough.
2. Mix the Dough
In a large mixing bowl, combine 3 1/2 cups of flour and 1 1/2 teaspoons of salt. Pour in the activated yeast mixture. Stir with a wooden spoon or spatula until a shaggy dough forms. The dough should come together and start to pull away from the sides of the bowl, showing signs of gluten development.
3. Knead the Dough
Turn the dough out onto a lightly floured surface. Knead it by hand for about 8 to 10 minutes until it becomes smooth and elastic. If you prefer using a stand mixer, fit it with a dough hook and knead on low speed for 5 to 6 minutes. The kneading process is crucial as it develops the gluten, giving the bread its structure and chewiness.
4. First Rise
Place the kneaded dough in a lightly oiled bowl, turning it once to coat all sides with a thin layer of oil. Cover the bowl with a clean kitchen towel and let the dough rise in a warm place for 1 to 2 hours, or until it has doubled in size. This first rise allows the yeast to ferment and the dough to develop flavor and airiness.
5. Shape the Loaf
After the dough has doubled, gently punch it down to release the air. Turn the dough out onto a floured surface and shape it into a round loaf. Place the shaped dough on a piece of parchment paper. This step is key to forming the structure of your bread and ensuring it bakes evenly.
6. Second Rise
Cover the shaped loaf with a kitchen towel and let it rise again for 30 to 45 minutes. Meanwhile, preheat your oven to 450°F (230°C) with your Dutch oven or baking stone inside. This second rise, often referred to as “proofing,” gives the dough one last chance to develop before baking, ensuring a light and airy interior.
7. Bake the Bread
Carefully transfer the dough on the parchment paper into the preheated Dutch oven. Cover the Dutch oven with its lid and bake for 30 minutes. After 30 minutes, remove the lid and bake for an additional 10 to 15 minutes, or until the crust turns a beautiful golden brown. The uncovered baking step allows the crust to crisp up perfectly.
8. Cool and Serve
Once baked, remove the bread from the oven and transfer it to a cooling rack. Allow the bread to cool completely before slicing. This cooling period is essential as it lets the interior set, ensuring the bread slices nicely without being gummy.
Tips, Shortcuts, and Recipe Variations
Important Notes:
- Water Temperature: The water must be between 110°F and 115°F. Too hot, and it will kill the yeast; too cold, and the yeast won’t activate properly.
- Kneading: Proper kneading is crucial for gluten development. If kneading by hand, spend the full 8 to 10 minutes for best results.
- Rising Environment: Place your dough in a warm, draft-free area to ensure a steady rise. If your kitchen is cold, you can place the bowl in an off oven with just the light on.
Tips and Shortcuts:
- Stand Mixer Option: If you have a stand mixer, use the dough hook to knead the dough for a quicker, less labor-intensive process.
- Overnight Fermentation: For enhanced flavor, you can let the dough rise in the refrigerator overnight during the first rise. Just let it come to room temperature before shaping.
- Flour Variation: For a slightly different flavor and texture, you can substitute up to 1 cup of all-purpose flour with bread flour, which has a higher protein content and develops more gluten.
- Pre-Shaped Loaf: If you prefer a more artisanal look, you can experiment with shaping the dough into an oval or even a baguette shape.
Recipe Variations:
- Herbed Bread: Add 1-2 tablespoons of chopped fresh rosemary or basil to the dough for an extra burst of herbal flavor.
- Garlic Bread: For garlic lovers, incorporate 1-2 minced garlic cloves into the dough, or brush the loaf with garlic butter immediately after baking.
- Cheesy Twist: Mix in ½ cup of grated Parmesan or Pecorino Romano into the dough for a subtle cheesy flavor.
- Whole Grain Option: Replace half of the all-purpose flour with whole wheat flour for a denser, more nutritious loaf.
- Olive Addition: Stir in ½ cup of chopped olives into the dough for a savory Mediterranean touch.
How to Store and Reheat Leftovers
Storing Leftovers:
If you have leftover Rustic Italian Crusty Bread, store it in an airtight container or wrap it tightly in plastic wrap. The bread will keep well at room temperature for up to 2 days. For longer storage, you can freeze the bread. To freeze, slice the bread first, then place the slices in a freezer-safe bag, and freeze for up to 3 months.
Reheating Instructions:
- Oven: Preheat your oven to 350°F (175°C) and place the bread slices on a baking sheet. Heat for 10-15 minutes until warmed through.
- Toaster/Grill: For individual slices, use a toaster or a grill pan to reheat and crisp up the crust.
- Microwave: Although not ideal for maintaining crispness, you can microwave slices for 20-30 seconds. For a better result, combine microwave with a brief stint in a toaster or oven.
Food and Drink Pairings
Ideal Food Pairings:
- Olive Oil & Balsamic Vinegar: Serve with a small dish of high-quality extra virgin olive oil mixed with a bit of balsamic vinegar for dipping.
- Cheese Plate: Accompany with a selection of cheeses, such as mozzarella, Parmesan, or goat cheese, for a delightful contrast.
- Soup: Pair with a hearty minestrone or tomato basil soup to create a comforting meal.
- Sandwiches: Use as the base for a delicious sandwich with prosciutto, arugula, and fresh mozzarella.
Beverage Pairings:
- White Wine: A crisp, dry white wine like Pinot Grigio or Sauvignon Blanc pairs perfectly with the light, airy texture of the bread.
- Red Wine: A light red such as Chianti can also complement the flavors, especially if served with a robust pasta dish.
- Sparkling Water: Refresh your palate with a glass of sparkling water infused with lemon or lime.
- Iced Tea: A lightly sweetened iced tea with a sprig of mint offers a refreshing contrast to the rich, savory flavors of the bread.
Frequently Asked Questions (FAQs)
Q: Can I use whole wheat flour instead of all-purpose flour?
A: Yes, you can substitute up to half of the all-purpose flour with whole wheat flour for a denser, more nutritious loaf. However, keep in mind that whole wheat flour may result in a slightly heavier texture.
Q: How can I tell if the dough has risen enough?
A: The dough is ready for the next step when it has doubled in size. This typically takes 1–2 hours in a warm environment. If your kitchen is cooler, it may take a bit longer.
Q: What if my dough is too sticky?
A: If your dough feels too sticky during kneading, sprinkle a little extra flour on your work surface. However, avoid adding too much as it can make the bread dense.
Q: Can I shape the dough into a different form?
A: Absolutely! While this recipe calls for a round loaf, you can experiment with shaping the dough into an oval, baguette, or even rolls. Adjust baking times accordingly based on the shape and size.
Q: How do I achieve a really crispy crust?
A: Preheating your Dutch oven or baking stone is key to a crispy crust. Additionally, you can brush the dough lightly with water or olive oil before baking to promote browning.
Q: Can I make this bread ahead of time?
A: Yes, you can prepare the dough ahead of time and let it rise in the refrigerator overnight. When ready to bake, let it come to room temperature, then proceed with shaping and baking.
Final Thoughts
Rustic Italian Crusty Bread is more than just a side dish—it’s an experience that transforms any meal into a celebration. Its crunchy crust, soft interior, and authentic Italian flavor make it a versatile and satisfying addition to your culinary creations. Whether you’re enjoying it with a rich pasta dish, a hearty soup, or simply on its own with a drizzle of olive oil, this bread is sure to become a beloved staple in your kitchen.
I hope you found this comprehensive guide to making Rustic Italian Crusty Bread both informative and inspiring. If you try this recipe, please share your experience and any creative twists you’ve added in the comments below. Don’t forget to share this recipe with your friends and family, and subscribe to our blog for more delicious recipes, expert cooking tips, and culinary inspiration.